

Anthurium Propagation: Methods and Best Practices for Healthy Plant Growth
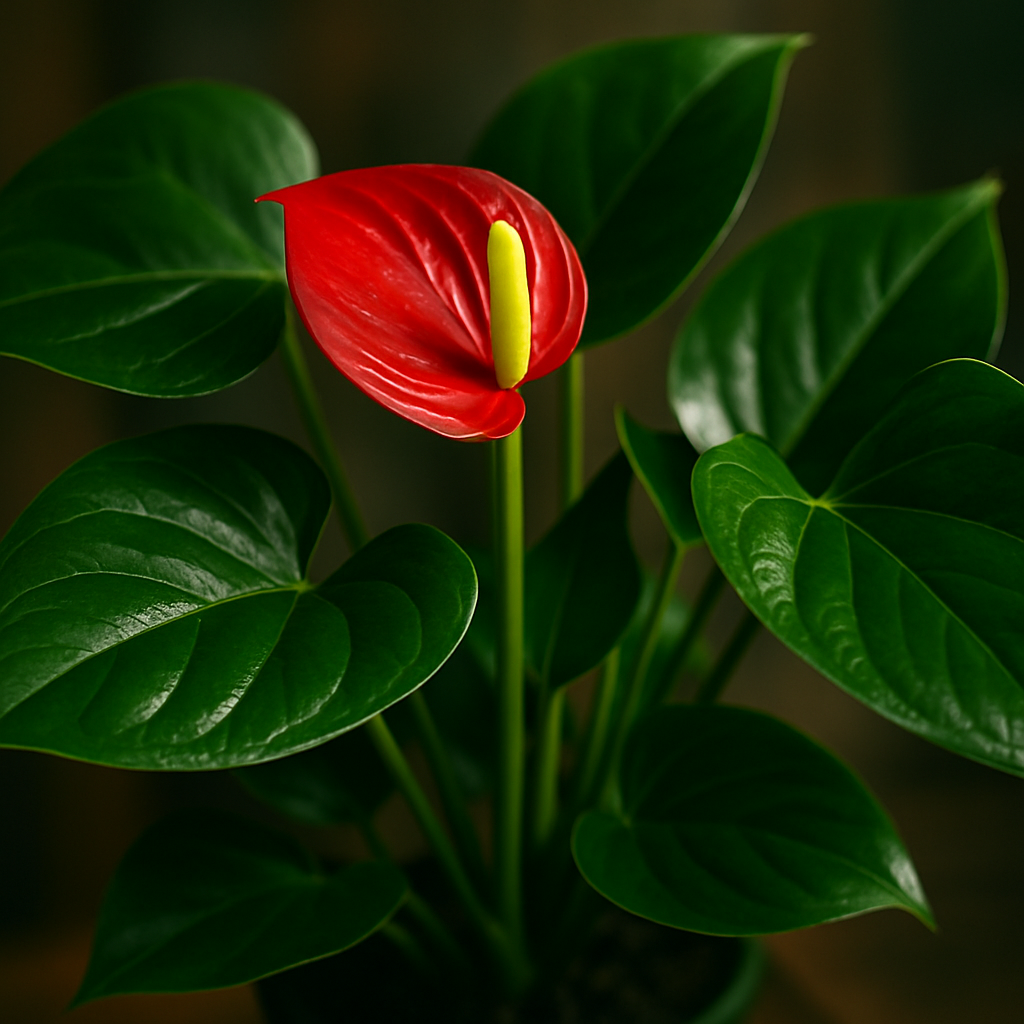
Anthuriums are stunning plants with their glossy leaves and vibrant, eye-catching flowers. As a lover of these tropical beauties, have you ever wondered how to multiply your collection without constantly buying new plants? That's exactly where anthurium propagation comes into play. Propagating your own anthuriums not only saves you money but also lets you expand your indoor jungle with some satisfying hands-on gardening.
So, why is anthurium propagation such a game-changer? Well, these plants have unique growth habits that make them surprisingly rewarding to propagate once you know the secrets. Whether you’re dealing with a mature plant bursting with new shoots or a prized variety you want to clone, successful propagation lets you create genetically identical plants that maintain all those special traits you love.
Getting started might seem intimidating, especially if you’re new to plant propagation. What’s the best method? Can you do it indoors? How do you know when your baby plants are ready for their own pots? These questions pop up all the time—but don't worry, each step is easier once you break it down. With a bit of patience and the right technique, you’ll be greeting new anthurium plants in no time.
Imagine cutting a section from your thriving anthurium and watching it root, develop, and grow into a lush new addition to your home. It's not just about the end result; it’s the rewarding process of nurturing life and building your own plant family. Plus, when you propagate your anthuriums, it encourages healthier plants overall by promoting vigorous new growth.
Ready to uncover the easiest, most effective ways to propagate anthuriums? This guide will walk you through everything from selecting the right cutting to creating the perfect soil-less mix, ensuring your propagation journey is both fun and successful. For example, crafting an optimal anthurium potting mix is crucial for young plants—check out our detailed advice on how to create the ideal anthurium potting mix to give your cuttings the best environment possible.
Let’s dive deep into the world of anthurium propagation and unlock the secrets to growing your own lush indoor garden with these captivating plants!
TL;DR
Want to grow your anthurium collection with ease? Anthurium propagation is all about mastering simple steps—from selecting healthy cuttings to providing the right soil-less mix—to watch new plants thrive.
With patience and proper care, you’ll enjoy vibrant growth and a flourishing indoor garden in no time.
Step 1: Selecting the Right Anthurium for Propagation
Ready to grow your own thriving anthurium plants? The very first step in successful anthurium propagation is picking the perfect mother plant. This choice not only impacts your success but also the health and vibrancy of your new plants.
Why does selecting the right anthurium matter so much?
Think of it like this: just like a family recipe handed down through generations, the quality of the parent plant influences all its offshoots. You want to start with the best genetics to ensure lush growth, strong roots, and striking foliage that any anthurium lover would be proud of.
Not sure what “the best” looks like? Don’t worry — it's easier than you’d think to spot a healthy anthurium.
Look for vibrant, mature leaves
Choose an anthurium with vibrant, glossy leaves without any signs of discoloration, spots, or pests. Mature leaves indicate the plant is well-established, which means it'll likely pass on its robust qualities to its cuttings.
Yellowing leaves or damaged foliage are red flags that the plant might be stressed or sick. Propagating from a struggling plant can set you back because issues might transfer to the new plants.
Check for active growth
Active growth is what you want! This signals the plant is thriving and ready for propagation. Look for new leaves or stems pushing out— these are signs of healthy development and good energy within your anthurium.
In fact, most experts agree early spring through summer is the best time to propagate your plants since they’re naturally more vigorous. According to Iowa State University's extension on propagating houseplants, working with healthy, vigorously growing plants increases your chances of success significantly.
Spotting signs of good root structure
Though you can’t see roots easily without repotting, some clues hint at strong roots. Anthuriums that stand upright firmly and have no wobble in the pot usually have well-established roots. If your anthurium appears leggy or unstable, it could mean weak root systems.
When possible, gentle removal from the pot to inspect the roots can make a big difference. Look for healthy white or light tan roots without mushy or dark spots. Strong roots help new cuttings or divisions get a solid start.
Choosing the right propagation method based on anthurium type
Did you know not all anthuriums propagate the same way? Your selection should align with appropriate propagation methods. For example, some anthurium varieties respond wonderfully to stem cuttings, while others are best propagated via division.
Understanding your specific anthurium helps tailor your approach. For more on environment factors and soil mixes to support your propagation efforts, check out our guide on creating the ideal anthurium potting mix.
Is the plant free from pests and diseases?
Before selecting your plant, inspect it carefully for pests like aphids, mealybugs, or spider mites, as well as fungal diseases. These issues can not only stunt propagation success but also harm your entire indoor garden.
Don’t overlook tiny signs, such as sticky residue, white fluff, or webbing—these often signal pest infestations. Choose only plants that appear pest-free and healthy.
Do you want flowering or foliage varieties?
Some anthurium enthusiasts focus on flowers, others on foliage; your goal influences which plant you pick for propagation. If you're after vibrant blooms, look for a mature, flowering anthurium with plenty of healthy spathes.
Conversely, for striking leaves, select varieties known for unique foliage patterns, shapes, or colors when picking your mother plant. This ensures you pass on the traits you love.
Prepare your tools and materials
Once you’ve chosen the right anthurium, make sure your tools — like sharp scissors, clean pruning shears, and sterilizing wipes — are clean. This prevents infection in your cuttings, boosting survival odds.
Ready to get started? Picking the right plant sets a solid foundation, and with healthy anthurium cuttings, you’re already halfway to expanding your lush indoor jungle.
For detailed insights on propagation techniques after you've selected your plant, keep following our comprehensive guide on anthurium propagation. The journey to multiply these stunning plants is easier than you think once you start right.
Step 2: Propagation by Division
Have you ever noticed how mature anthuriums often grow in charming clumps? Those clumps hold the secret to multiplying your plants easily. Propagation by division is one of the simplest and most reliable ways to get new anthurium plants from the ones you already love. Let’s dive into how you can divide your anthurium like a pro.
Why Choose Division for Anthurium Propagation?
Division involves separating a healthy adult plant into smaller sections, each capable of growing independently. It is especially ideal if your anthurium has multiple crowns or stems emerging from its root ball. This method preserves the plant’s traits perfectly since you’re essentially cloning your plant.
Unlike seed propagation, division gives you quicker results, and unlike stem cutting, it usually ensures robust roots with less risk of failure. Plus, it’s an eco-friendly way of sharing your greenery with friends and family or expanding your indoor jungle.
Gather Your Tools and Prepare Your Space
Before starting, grab a few essentials: a clean, sharp knife or garden shears, gardening gloves, fresh well-draining potting mix (try FAS's custom soil-less blends!), and pots with good drainage. Clean your tools with rubbing alcohol to prevent disease transmission—this step boosts your success rate significantly.
Choose a spot with indirect light and lay down some newspapers or a tarp. You don’t want soil making a mess, and good lighting will help you see root details clearly.
Step-by-Step Guide to Dividing Your Anthurium
First, gently remove the anthurium from its pot. Don’t yank—ease it out to avoid damaging roots. Next, shake off or carefully wash away excess soil to expose the root system. Now it’s time to look closely: identify natural divisions, usually where several stems or crowns are connected but can be separated by gently teasing apart roots.
If the roots are densely tangled, use your clean knife to slice apart the root ball. Make sure each division has at least one healthy stem and a good portion of roots attached—this helps the new plants establish quickly.
Once separated, plant each division in its own pot filled with fresh soil mix. Water thoroughly but avoid waterlogging—the roots need to settle into their new homes comfortably.
Place your newly potted divisions in a warm, humid area with bright indirect light. Maintaining humidity around 60% improves rooting success, so consider a humidity tray or a gentle mist.
Aftercare Tips: How to Help Your Divisions Thrive
For the first few weeks, keep the soil consistently moist but not soggy. Check daily because new divisions can dry out quickly as they re-establish roots. Boost humidity if you notice leaf edges browning or curling. Avoid fertilizing until new growth appears—jumping the gun can stress your plants.
Wondering when you’ll see new leaves? Usually within a month, these divisions start showing signs of new life. If not, don’t fret—some anthuriums take a bit longer depending on growing conditions.
Propagation by division isn’t just practical—it's rewarding to watch your mature anthurium generously share its beauty. As succulentsbox explains, splitting plants maintains their genetic traits while giving them fresh energy to thrive. To deepen your know-how, check out this expert video on anthurium care and propagation that goes hand-in-hand with division techniques.
Ready to get dividing? Just remember: patience and care make all the difference in successfully multiplying your luscious anthuriums. Give it a go, and watch your indoor jungle grow exponentially.
Step 3: Propagation Using Stem Cuttings
If you’re looking to multiply your anthuriums quickly and with minimal fuss, propagation using stem cuttings is a fantastic method to try. Unlike division, stem cuttings let you create completely new plants from a healthy parent, and it’s especially rewarding watching those little cuttings develop roots and leaves right before your eyes.
Choosing the Right Stem Cutting
Start by selecting a healthy, mature stem from your anthurium plant. Look for one that has at least two or three nodes—the small protrusions or bumps along the stem where roots and leaves can emerge.
Pro tip: Use a clean, sharp knife or pair of pruning shears to make a clean cut just below a node. Clean cuts help prevent infection and improve your rooting success. If you don’t have pruning shears, a sterilized razor blade works well too.
Preparing Your Cutting for Success
Once you've snipped your stem, the next step is to prepare it to encourage rooting. Remove any lower leaves, leaving just one or two leaves at the top. Too many leaves can increase moisture loss and stress your cutting.
Many growers recommend dipping the cut end in rooting hormone powder or gel. It’s not mandatory but can significantly speed up root development and increase success rates, especially with anthuriums. You can find organic rooting hormones that align perfectly with eco-conscious plant care.
Choosing the Right Medium
Stem cuttings root best in a light, airy medium that retains moisture but drains well. Many enthusiasts prefer using a custom soil-less mix formulated specifically for aroids, much like the ones offered by FAS. This ensures the cutting stays moist but not soggy, preventing rot.
You can also propagate stem cuttings in water, but soil-less mixes tend to produce stronger roots more suitable for transplanting. If you go the water route, be sure to change the water every couple of days and keep it filtered or distilled.
Creating the Ideal Environment
Humidity is everything when rooting stem cuttings. High humidity minimizes water loss and encourages root growth. Place your cutting in a warm spot with indirect light—direct sun can scorch the tender cutting.
Setting up a humidity dome, a simple clear plastic cover, or placing your pot inside a plastic bag can mimic a greenhouse. Just remember to ventilate daily to prevent mold.
How Long Until Roots Appear?
Patience is key! Typically, you’ll see roots within 4 to 6 weeks. To check progress without disturbing the cutting too much, gently tug on it after a few weeks—if there's resistance, roots are developing.
Keep the medium lightly moist during this time, not soaked. Overwatering is a common mistake that can lead to rot.
When and How to Transplant
Once your cutting has several healthy roots about 2 to 3 inches long, it’s time to transplant into a larger pot with your preferred potting medium. Gradually acclimate your new plant to regular humidity and light conditions.
Want to see stem cutting propagation in action? This detailed guide on anthurium stem cuttings breaks down every step visually.
So, why not try this propagation method to add new green friends to your collection? With a bit of care and attention, stem cutting propagation is a rewarding way to expand your indoor jungle and keep your anthurium passion growing.
For a deep dive into common pitfalls and troubleshooting, check out this expert video on rooting success for anthuriums.
Remember, whether you’re using rooting hormone or a soil-less mix from trusted providers like FAS, every step you take can make or break your propagation success. Don’t rush it, and enjoy the process!
Step 4: Propagation from Seeds
Ever wondered if you could grow anthuriums from seed and add rare varieties to your collection? Propagation from seeds is a rewarding method that lets you explore the next generation of these stunning plants. While it takes more patience than stem cuttings, starting your anthurium propagation journey with seeds offers exciting possibilities, especially when you're after unique hybrids or want to witness the full life cycle of your plants.
Harvesting and Preparing Seeds
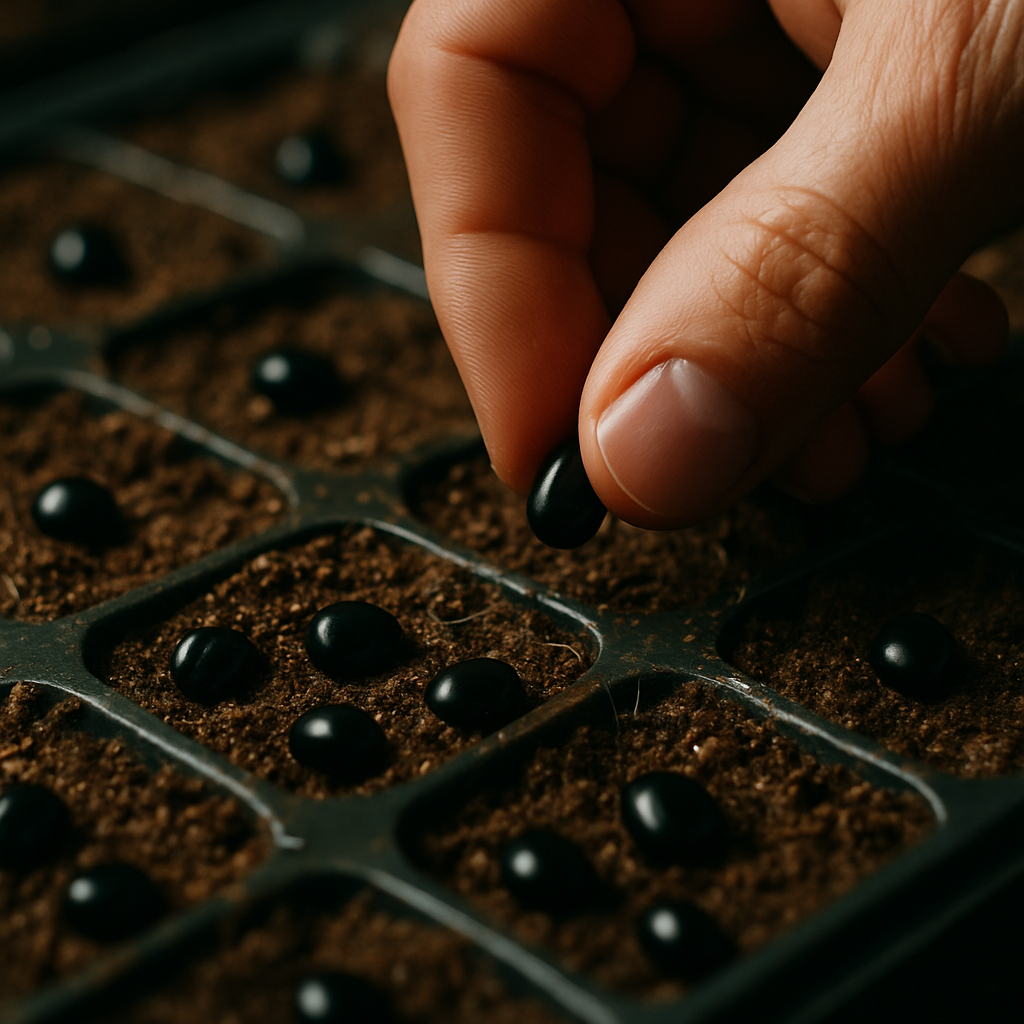
First things first: you need ripe seeds. Anthurium seeds develop inside berries after successful pollination, changing color from green to a vibrant red or orange when mature. Harvest them carefully by gently removing the pulp surrounding the seeds. A simple way is to soak the berries in water for a few days and then rub off the pulp to reveal the shiny black seeds underneath.
Be sure to use fresh seeds as viability declines rapidly. If you have access to a rare hybrid, like the coveted Anthurium magnificum, seed propagation can be particularly rewarding. According to expert growers, fresh seeds boost your chances of germination dramatically as detailed here with Anthurium magnificum seeds.
Step-by-Step Seed Sowing
Now, let's get to planting. Use a well-draining, sterile medium—FAS’s custom soil-less mixes with great aeration and moisture retention work perfectly here. Spread the seeds evenly on the moist surface and press them lightly into the substrate, but don’t bury them deeply because anthurium seeds need light to germinate.
Cover your container with a clear plastic lid or plastic wrap to maintain humidity. Keep the temperature steady between 75-85°F (24-29°C). Placing the seeds in a warm, indirect light location is crucial; direct sunlight can be too intense and dry out the seeds.
Patience is key here: germination usually takes anywhere from 3 to 8 weeks. You might notice tiny shoots appearing before roots fully establish. During this time, mist the medium regularly to keep it moist but never soggy, as overwatering leads to rot.
Care After Germination
Once your seedlings emerge, gradually increase airflow around them by slightly venting the cover daily—this prevents mold and fungal issues. As the tiny plants develop several true leaves, you can begin easing them into ambient indoor conditions away from the humidity dome.
When seedlings reach around 2-3 inches tall and develop sturdy roots, it’s time to transplant them individually into small pots filled with lighter soil mixes enriched with organic nutrients, like those offered by FAS. This supports healthy growth without overwhelming delicate roots.
Does propagating from seed sound like a long wait? It is, but think of it as cultivating a little treasure. Seed-grown anthuriums often develop stronger genetic vigor, and you may end up with plants that are adapted uniquely to your environment and care—plus, seeing growth from seed to mature plant is deeply satisfying.
For a visual walkthrough of this process, you can watch guides like this detailed video on anthurium propagation from seeds to get a step-by-step look at seed germination and care.
With the right supplies, like well-draining soil mixes and organic foliar feeds from FAS, you’ve got everything you need to take on seed propagation successfully. So, why not try growing your next anthuriums from seed? It’s an incredible way to deepen your connection to your plants and expand your indoor jungle with some truly unique green beauties.
Comparing Anthurium Propagation Methods: Division, Cuttings, and Seeds
If you’re thinking about growing your anthurium collection, it’s worth exploring the main propagation methods: division, cuttings, and seeds. Each method has its own perks and challenges, which means the best choice depends on your patience level, available plants, and gardening vibe.
Division: Splitting Your Thriving Anthurium
Division involves separating a mature, well-established anthurium into multiple smaller plants. It’s hands-down the quickest route to new plants that look just like the parent.
This method is fantastic if your plant’s roots are crowded or if it’s outgrown its pot. Simply take the plant out, gently separate clumps ensuring each has roots and leaves, and pot them individually. Because you’re working with healthy root systems and foliage, new plants establish swiftly.
However, division requires a sizable and mature parent plant, so it’s not an option if you’re starting with just a cutting or seed. Timing matters too — spring and early summer are ideal because the plant is actively growing and resilient. This expert guide on anthurium division walks you through the process to minimize stress on your plant.
Cuttings: Your DIY Anthurium Starter Kit
Cuttings offer a super accessible way to propagate, perfect even for beginners. Just snip a healthy stem segment about 6-8 inches long, ideally with a node (where a leaf attaches), and root it in water or soil.
Cuttings are exciting because you can watch roots develop—especially when rooting in water—bringing a visual bonus to your propagation journey. Plus, you don’t need a massive parent plant to start, making it ideal if you’re working with limited space or younger plants.
On the flip side, cuttings can be a bit more finicky than division. Success hinges on choosing healthy stems and maintaining humidity and warmth. Some cuttings might fail, especially if conditions aren’t optimal. Using a rooting hormone and a custom soil-less mix like those from FAS can significantly boost success rates.
Wondering about the exact technique? Check out this straightforward guide to propagation from cuttings for step-by-step tips.
Seeds: Growing Anthurium From the Ground Up
Propagation by seeds is the slowest but most rewarding path, offering a dive into the very essence of plant growth. Starting from seed means you might discover new traits or stronger genetic diversity, but patience is key—it may take years for your plant to flower.
Seeds require the most care and attention: fresh seeds, a sterile soil-less germination mix such as the ones FAS provides, consistent moisture, warmth, and indirect light. Germination can happen weekly, but lasting growth and flowering take extended care.
This method is best if you’re a dedicated anthurium lover looking to experiment or breed new varieties. Keep in mind that seedlings grow slowly compared to propagated divisions or cuttings. For a detailed start, the floriculture syllabus offers comprehensive insights on seed germination and care.
So, What Should You Choose?
All three propagation methods have their place depending on your goals:
- Division wins for speed and replication—perfect for quickly multiplying healthy adult plants.
- Cuttings offer an easy, visual approach to propagate from a smaller parent or stem.
- Seeds are for patient growers looking for diversity and excitement of growing from scratch.
If you’re new, division or cuttings might be less intimidating and give faster gratification. But if you want to fully immerse in the cycle of life and discovery, seed propagation is a beautiful long-term project.
| Feature | Division | Cuttings | Seeds |
|---|---|---|---|
| Speed to New Plant | Fast (weeks to establish) | Moderate (4-8 weeks to root) | Slow (months to years to mature) |
| Plant Size Needed | Large, mature parent | Any healthy stem | Fresh seeds |
| Success Rate | High | Medium to high with care | Variable, requires patience |
| Genetic Diversity | None (clone) | None (clone) | High (unique plants) |
| Skill Level | Beginner-friendly | Beginner to intermediate | Intermediate to advanced |
Remember, whichever method you choose for anthurium propagation, utilizing premium supplies like FAS’s soil-less mixes and organic foliar feeds can improve your plant's health and rooting success. And honestly, there’s something magical about watching new anthuriums thrive whether you started them from a chunky division, a delicate cutting, or tiny seed.
Ready to try? Start with your healthiest specimen, gather high-quality potting mixes, and experiment with these methods. Soon, your indoor jungle will be bursting with more colorful Flamingo Flowers than ever!
Common Challenges in Anthurium Propagation and How to Overcome Them
When it comes to anthurium propagation, things don't always go as smoothly as you'd hope. Even if you've got the basics down, you might hit some bumps that can trip up your progress and test your patience.
Slow Root Development: Patience is Key
One of the biggest frustrations growers face is how slowly anthurium cuttings or divisions root. Some enthusiasts wait 6 to 8 weeks or more before seeing any real root growth, which can feel like an eternity when you're eager for new plants.
To speed this up, use warm, humid conditions. A heat mat set between 70-85°F combined with a humidity dome or regular misting encourages roots to take hold faster. And don't forget quality soil-less mixes — something light and airy, like FAS’s custom blends, helps prevent soggy soil that delays rooting.
Fungal Issues: The Moisture Balancing Act
Keeping the soil moist but not soggy sounds easy, right? Not always. Overwatering or poor drainage can lead to root rot and fungal infections, devastating your freshly propagated anthuriums.
Here’s a pro tip: always use pots with drainage holes paired with well-draining, organic-rich mixes. Consider using a moisture meter to maintain just the right dampness level and avoid overwatering. If you spot any mold or fungus, improve airflow around the plants and reduce watering slightly to keep problems at bay.
Light and Temperature Woes: Too Much or Too Little?
Another common hiccup is providing the right light and temperature. Anthuriums are tropical plants that thrive in bright, indirect light but suffer if exposed to direct sun or deep shade.
Not enough light can stunt growth and root formation, while too much heat or sun can scorch leaves. Position your plants near an east-facing window or under grow lights during darker months. Keep them warm—ideally between 70 and 90 degrees Fahrenheit—to mimic their natural environment.
Pest Problems During Propagation
Spider mites, mealybugs, and fungus gnats can sneak in when your new plants are at their most vulnerable. Regularly inspect leaves, wipe dust off, and consider natural pest treatments like neem oil to protect your crop without harsh chemicals.
Worried about fungus gnats? Let the top few inches of soil dry out between waterings and use natural remedies like Diatomaceous Earth to keep these pesky pests away.
Is there a quick fix for these challenges?
While propagation requires some trial and error, keeping conditions consistent — warm, humid, and light-balanced — and using premium supplies like FAS's specialized soil-less mixes and organic foliar feeds sets you up for much better success.
Remember, every propagation attempt teaches you more about your plants’ unique needs. Don’t get discouraged: these challenges are part of the learning curve toward a thriving indoor jungle.
For a detailed overview of anthurium care post-propagation, check out this comprehensive guide on Anthurium propagation and care. Also, insights from Dennis 7 Dees' Anthurium care guide offer great tips to avoid common pitfalls, and learning about humidity and watering balance can really make your propagated plants thrive.
Conclusion
Wrapping up our deep dive into anthurium propagation, it's clear that patience and attention to detail make all the difference. You've learned how critical consistent warmth, humidity, and the right soil mix are, especially when teamed with natural pest management techniques. But let’s be honest—anyone who’s propagated anthuriums knows that surprises happen. They’re living things, and each plant has its own personality to discover.
So, what’s the real secret to success? It’s embracing the journey as much as the destination. Remember, even experts face setbacks, but every attempt teaches you something new about your unique growing space and your plant’s needs.
If you’re wondering where to go from here, start by fine-tuning your environment with premium supplies like those offered by FAS—think custom soil-less mixes and organic foliage feeds that promote healthy roots and vibrant leaves.
And don’t forget: your propagation success will improve as you observe and adapt. Keep checking those plants regularly for pest issues, adjust humidity when needed, and celebrate each new leaf or root growth. Anthurium propagation isn’t just about cloning—it’s about creating a thriving indoor jungle that reflects your care and passion.
Ready to take your skills even further? Dive deeper into expert-level anthurium care and discover tips that can turn your propagated plants into stunning focal points in any room.
Frequently Asked Questions about Anthurium Propagation
Got questions about anthurium propagation? You’re not alone. Let’s tackle some of the most common queries so you can feel confident growing your own stunning anthurium babies.
What’s the easiest method for anthurium propagation?
The go-to method for most enthusiasts is division, especially for mature plants with multiple stems or crowns. It’s straightforward—just separate the root ball carefully, making sure each section has some leaves and roots. But if you want to try something different, stem cuttings and seed propagation are also options, though they take more patience.
How long does it take for new roots to appear?
Patience truly pays off here. Under ideal conditions—steady warmth, high humidity, and a light, well-draining mix—you can expect roots to start showing within 3 to 6 weeks. But remember, each plant responds differently. Some stubborn types may take longer, so stay consistent and keep a close eye on moisture levels.
Can I propagate anthuriums indoors all year round?
Absolutely! Anthuriums are tropical beauties and thrive indoors when you simulate their natural habitat. With quality products like custom soil-less mixes and organic foliage feeds, you can create the perfect setup. Just make sure to adjust humidity, temperature, and light as seasons change to keep your propagation efforts on track.
What are the biggest mistakes to avoid during propagation?
Overwatering is often the silent killer. Too much water can cause your cuttings or divisions to rot quickly. Another common slip-up is neglecting humidity—these plants crave moist air, especially when propagating. Lastly, skipping sterilization of your tools can introduce diseases, so always start with clean scissors or knives to keep your plants happy.
How do I know when a cutting is ready to pot?
Look for healthy root growth at least a couple of inches long before transferring to soil. Also, new leaf development is a good sign your propagation project is on the right path. If you rush potting too soon, the cutting could struggle or fail to thrive. Patience here saves you both time and disappointment later.
Is it worth investing in premium anthurium varieties for propagation?
Definitely! Premium varieties not only bring unique foliage and blooms but often have better vigor and disease resistance, making propagation smoother. Sourcing your plants or supplies from trusted providers like FAS ensures you get top-notch quality that boosts your success rate.
What should I do if I spot pests on my propagated plants?
Act fast! Pest infestations can spread quickly, especially in the humid conditions favored by anthuriums. Use gentle, organic pest control methods to keep your plants safe without risking chemical damage. Regular monitoring also helps catch problems early, which is key for long-term propagation success.
Ready to master anthurium propagation? Keep these FAQs handy, and don’t be afraid to experiment with what you learn. Each experience nudges you closer to becoming an aroid pro with a flourishing indoor jungle.