

How to Create the Perfect Aroid Potting Mix for Healthy Anthuriums and Other Aroids
Ever noticed how your beloved aroids just don’t seem to thrive no matter what you do? You’ve got the right light, the watering down pat, but something’s missing—something beneath the surface. Chances are, it’s your potting mix. Yep, the soil your plants call home matters way more than you might think.
For us aroid lovers, creating that perfect potting mix isn’t just a gardening task; it’s kind of like cooking a recipe that your plants crave every day—a balance of moisture, aeration, and nutrients that makes their roots want to dive in and explore. And honestly, it’s easy to get it wrong with the usual garden soil or generic mixes that just don’t cut it.
Here’s where the magic of aroid potting mix steps in. Think of it as a custom blend tailored specifically for your tropical friends like anthuriums, philodendrons, or monstera—plants that need a light, airy mix that holds onto moisture without drowning those delicate roots. You know that moment when you repot a plant and it just instantly perks up? That’s exactly what the right mix does.
So, what makes a great aroid potting mix? We’re talking chunky bits for drainage, organic matter for nutrients, and enough air pockets so roots don’t suffocate. It can feel a little overwhelming at first, but trust me, once you nail it, you’ll see your plants flash their best leaves yet.
Maybe it sounds tricky, but it's not rocket science. You don’t have to reinvent the wheel either—there are tried-and-true guidance and custom mixes that can help. If you’re curious how to whip up that perfect blend—or just want to know the secret behind why your current soil isn’t working—stick around.
We’ll take it step-by-step together. Ready to bring your aroids back to life with the right potting mix? Let’s dive in and make your indoor garden happier, healthier, and more vibrant.
Oh, and if you want a deeper look into crafting the ideal mix for your anthuriums specifically, this guide is a great place to start.
TL;DR
Getting the right aroid potting mix means balancing chunky drainage bits with organic matter that holds moisture without drowning roots. Think airy, nutrient-rich, and well-draining—your plants will reward you with happier, glossier leaves.
Don’t stress the mix; with the right approach, you’ll see noticeable growth in no time.
Step 1: Understanding the Needs of Anthuriums and Aroids
Let’s be real—you want your anthuriums and aroids to thrive, not just survive. But understanding exactly what these tropical beauties crave beneath the surface? That’s the secret sauce for success with an aroid potting mix.
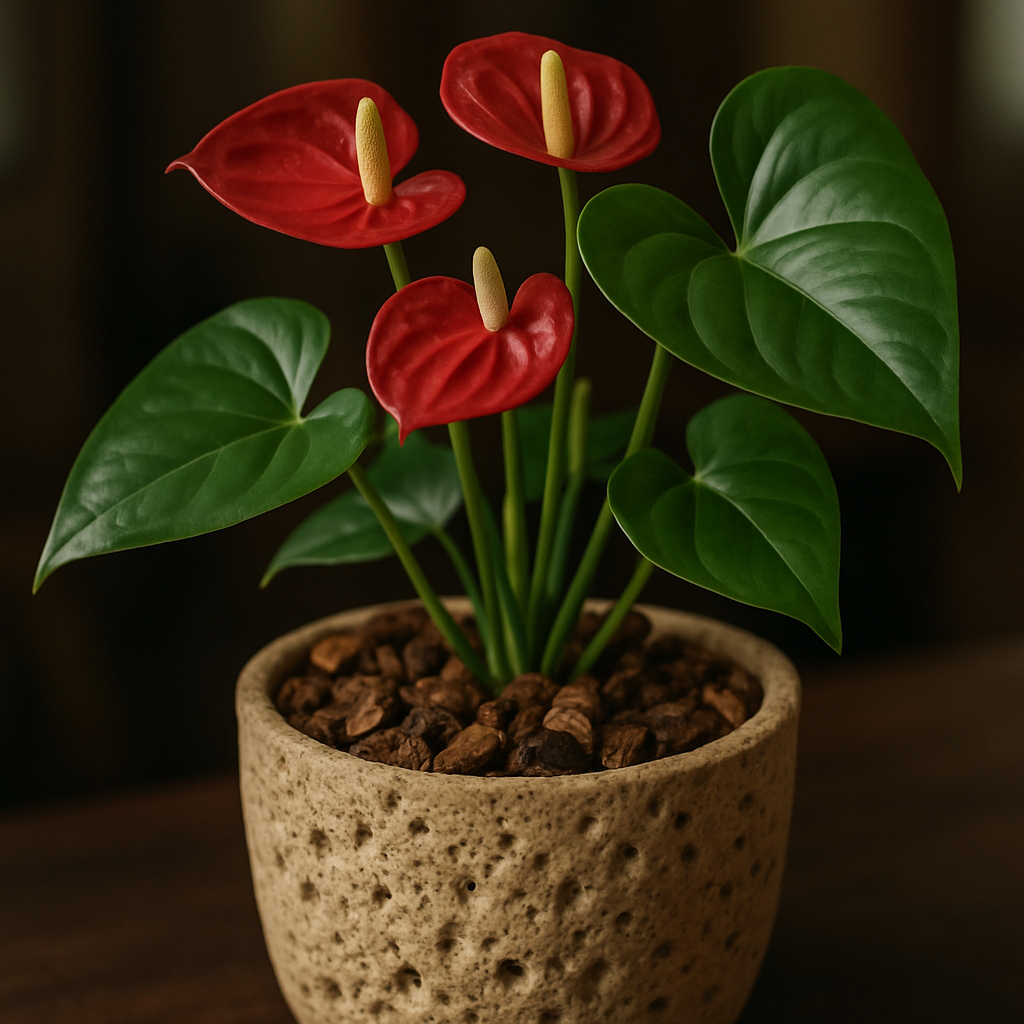
Picture this: you’ve got a stunning Anthurium showing off its bright, shiny leaves, but something feels off. Maybe the growth has slowed down or the leaves look a bit dull. It’s not just about watering or light—it often comes down to their soil. They have very specific needs, and ignoring them means you could unintentionally stunt your plant’s full potential.
Why Soil Matters More Than You Think
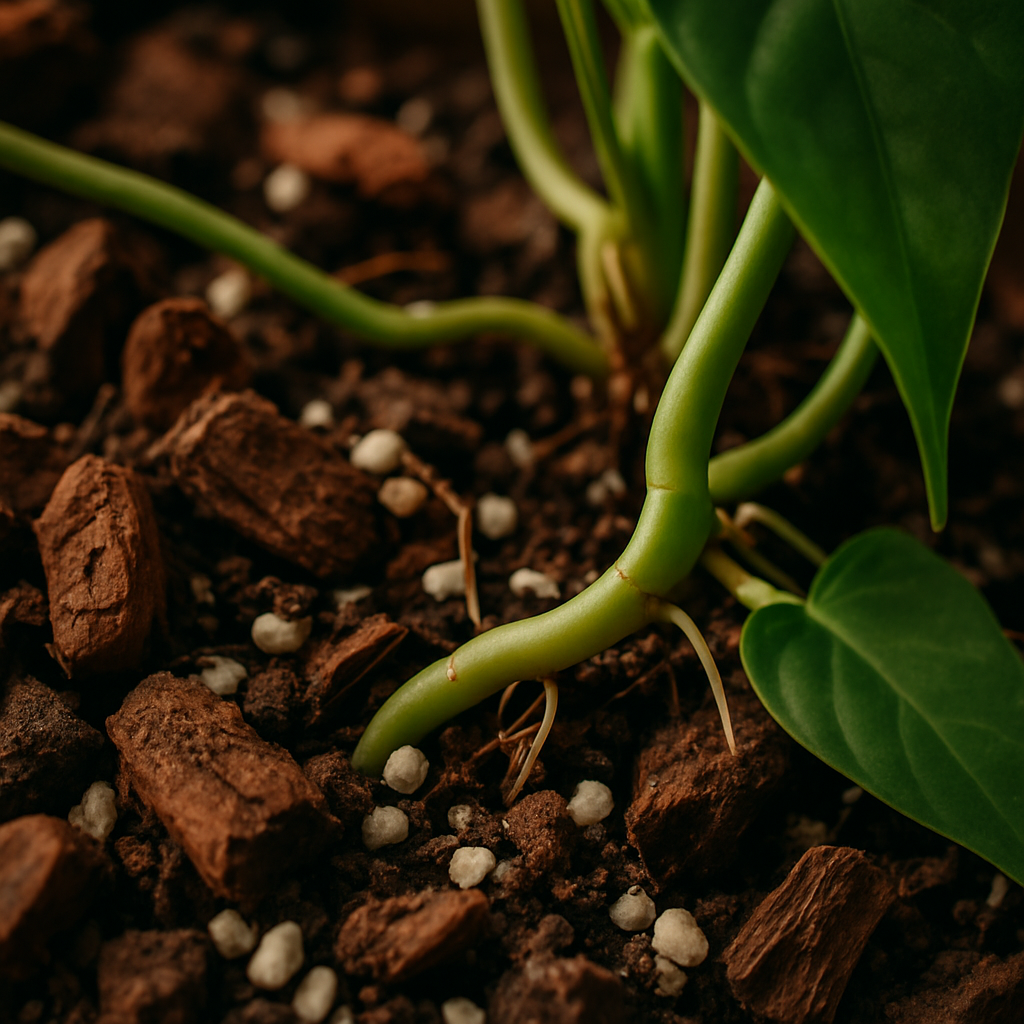
These plants hail from tropical rainforests, where their roots dangle into loose debris and humus, not packed dirt. So the soil they flourish in needs to replicate that environment—light, airy, packed with organic goodies but draining quickly.
If you’ve ever experienced root rot—or worse, lost a plant to soggy soil—you probably already know why drainage is king. Expert growers stress that anthuriums demand well-draining, slightly acidic soil with lots of organic matter to mimic those tropical forest floors. It prevents water from pooling and starving those roots of oxygen.
Getting Down to the Nitty-Gritty: What Your Anthurium’s Soil Needs
Okay, so now you get why drainage and aeration are vital, but what exactly does that look like?
- Chunky bits for drainage. Ingredients like pine bark and perlite keep the soil loose. Think of them as tiny air pockets letting roots breathe freely.
- Organic matter to hold moisture. Peat moss or coco coir provide water without drowning the roots. Coco coir also naturally leans a bit acidic, which your plants love, typically in the 5.5 to 6.5 pH range.
- Good aeration. Roots hate being stuck in compacted soil. Add pumice or horticultural charcoal to keep things airy and fresh, helping prevent fungal issues.
And here’s the kicker: the soil mix doesn’t just hold water and air—it’s also a nutrition source. Over time, organic material breaks down, slowly feeding your plant and encouraging lush growth. Have you ever noticed how some mixes smell almost like a forest floor? That’s exactly what you want!
Do You Know Your Plant’s pH?
This might surprise you, but slightly acidic soil isn’t just a preference; it’s essential for nutrient uptake. When the pH’s off, your anthurium can’t absorb key minerals even if they’re present. Using a simple soil pH tester can save you headaches down the line. If your soil tips alkaline, sprinkle in some sulfur. Too acidic? Lime can balance it back.
Believe it or not, tiny adjustments here can make the difference between a plant that just hangs on and one that bursts with life.
What About Aroids in General?
While anthuriums have their quirks, many aroids share similar soil preferences. They thrive in well-draining mixes rich in organic content. Think of the aroid potting mix like the perfect cocktail—if you mix it right, your plants will sip happily.
Some aroids, like arum lilies, grow from tuberous roots and need soil that holds moisture yet doesn’t stay soggy for a second longer than necessary. Overwatering them is a classic mistake most of us have made.
Does this all feel doable? Sometimes it’s easy to overthink. Just remember: loose, airy, nutrient-rich, and slightly acidic soil is your non-negotiable. Everything else moves from there.
For more details on achieving the perfect balance of ingredients and practical advice on exact mixes, you can check out the complete guide on Classic Landscapes’ expert recommendations for anthurium soil. And if you’re curious about how other aroids, like arum lilies, handle their soil needs, this piece on arum lilies offers great insights into their unique preferences.
So before mixing your soil or repotting your favorite plant, take a step back and really think about these needs. You’re not just putting dirt in a pot—you’re crafting a home that supports life, growth, and vibrancy for your cherished anthuriums and other aroids.
Step 2: Selecting the Ideal Ingredients for Aroid Potting Mix
Alright, so you’ve got a feel for what your aroids need—moisture without drowning, air without drying out, nutrients without the fuss. But now comes the fun part: picking the right ingredients for your aroid potting mix. It’s not about just grabbing any dirt from the garden. Nope, this mix is more like crafting the perfect recipe where every ingredient has a role in keeping your plants happy and thriving.
Let’s break down what goes into that soil cocktail and why each component matters. Think of it as assembling a team where everyone brings a unique skill to the table.
Coco Coir Chips: The Moisture Manager
If you’ve heard of peat moss, coco coir chips are kind of its eco-friendlier cousin. These come from coconut husks and pack a punch when it comes to water retention and drainage. They hold enough moisture for thirsty roots but won’t leave your plant sitting in a mud bath. Plus, they’re pH neutral, so no weird soil acidity surprises lurking here. This balance is gold for aroids, who hate being waterlogged but still need a good drink now and then.
Orchid Pine Bark: The Root Airer
Often called Orchiata, kindergarten-level orchid pine bark is a superstar in aroid mixes. Its chunky bits create little air pockets in your soil, making sure roots get plenty of oxygen. That’s crucial because suffocated roots are root-rotted roots. This bark also sneaks in some slow-release nutrients—which is a nice bonus. You basically get a natural, gentle feeding system for your plants without having to micromanage fertilizers.
Perlite and Pumice: The Lightweight Lifters
Now, these two volcanic products get lumped together, but each does its bit to keep your mix light and airy. Perlite, those white, porous granules you see in many potting mixes, improves drainage and prevents soil compaction. It helps your roots breathe better and stops excess water from hanging around like an uninvited guest.
Pumice, a porous volcanic rock, does the same but has the added benefit of holding onto moisture and nutrients and releasing them slowly. It’s like a gentle reservoir—no sudden floods or droughts. Just steady, reliable supply. Both are critical for making sure your aroid potting mix teeters on the edge of just right—not too wet, not too dry.
Organic Potting Soil: The Nutrient Foundation
Here’s the base that ties your mix together—a high-quality organic potting soil. This isn’t your dug-up garden dirt. It’s rich in organic matter, teeming with nutrients your aroids will gobble up. This acts as the food pantry, the cozy bed, and the anchor all in one for your plant roots. Without it, your mix would just be a bunch of airy ingredients with nowhere to really support growth effectively.
So, what’s the best way to combine these ingredients? A common starting recipe is roughly 40% orchid pine bark, 20% coco coir chips, 20% perlite or pumice, and 20% organic potting soil. But hey, this isn’t set in stone. You can tweak proportions depending on your plant’s specific needs or your local humidity and watering habits.
Wondering if you can just use regular garden soil instead? Let me stop you right there. Garden soil tends to be too dense and often brings pests and diseases you definitely don’t want inside your home or in your favorite pot. It’s best left to outdoor beds rather than your indoor aroids.
It might sound like a lot to juggle, but mixing the right potting soil is a game changer. You know that moment when a plant suddenly starts looking healthier, leaves perk up, roots grab hold stronger? Yeah, that often starts with the soil.
Not sure where to source these ingredients? Premium and sustainable options are increasingly available through specialty horticultural suppliers or online, tailored for aroid enthusiasts like us. You can find coco coir chips and orchid pine bark impurities-free and ready to use, eliminating the guesswork.
Quick tip: When buying perlite or pumice, look for chunky, lightweight granules. If it feels heavy or dusty, it might be low quality or mixed with unwanted materials.
Ultimately, your best aroid potting mix is the one you understand and feel confident tending to. Don’t hesitate to experiment a little here and there, observe how your plant responds, and adjust as you go. That’s how you become a true aroid whisperer.
For a deeper dive into the science behind these ingredients and to see how industry pros balance their mixes, check out this detailed guide on creating the perfect aroid potting soil from Dr. Greenthumbs. It’s packed with specific tips on ingredient ratios and more.
And if eco-friendliness is part of your plant-parent vibes, Rosy Soil’s take on well-draining potting mixes with sustainable ingredients is worth a read. They explore alternatives like biochar and compost that not only help your soil but the planet too.
Remember: the right ingredients build a foundation. It’s where roots can dive in and plants start dreaming big. So, grab your ingredients and start mixing—it’s not just soil, it’s your aroids’ new home.
Step 3: Preparing and Mixing Your Aroid Potting Mix
Alright, you’ve gathered all the components for your aroid potting mix — now what? Mixing it up might seem straightforward, but here’s the thing: how you combine these ingredients really changes the game for your plants’ health. You can’t just dump everything in a bucket and hope for the best.
Think about it like baking a cake. If your flour is too heavy or your sugar too little, the whole thing falls flat. Same with your soil. The goal here is a balance of drainage, aeration, and moisture retention — the perfect home for those delicate roots to thrive.
Step 1: Prepare Your Ingredients
Start by rinsing materials like perlite or pumice to wash away any dust or residues that might clog up your roots. Nobody wants a gritty, dusty mix suffocating their plant’s roots, right? If you’re using coco coir or chips, fluff them up a bit to avoid compacting later.
Quick heads up: when you buy your orchid bark or pine bark, make sure it’s chunky enough to allow airflow but not so chunky that water zips through instantly. The size should be about pea-sized or a bit bigger.
Step 2: Mixing the Ingredients
We usually go with a simple ratio that’s easy to tweak: 40% chunky bark, 30% coco coir, 20% perlite or pumice, and 10% something organic like worm castings or leaf mold.
But hey, this isn't set in stone. For plants that like it wetter, add a bit more coco coir or organic matter. If drainage feels slow, bump up the perlite or pumice. Just watch how your plant responds in the first few weeks.
Pro tip: mix the dry components thoroughly in a large tub before adding any water. This way, you’re sure the ingredients are evenly distributed, which makes it easier to spot any clumps or dusty pockets.
Adding Moisture Before Planting
Many people skip pre-wetting the mix, but gently moistening your potting blend beforehand helps roots settle in faster. Aim for damp, not soggy — squeeze a handful, and if a few drops come out, that’s too wet. The soil should feel like a wrung-out sponge.
Why not just regular potting soil?
Good question. Regular potting mixes tend to hold too much moisture and lack the aeration aroids crave. Over time, that sogginess can lead to root rot or fungal problems you really want to avoid. The chunkier texture here means roots get air AND water — a tricky balance but so worth it.
Wondering if you should add fertilizers now? Hold off for a bit. Your custom aroid potting mix is about providing the right environment first. Fertilizing plants in poorly mixed soil rarely helps and can even stress roots.
What if you want an eco-friendly edge?
Try swapping some perlite for biochar or introducing composted leaf mold instead of synthetic components. These not only support your plant but also give a nod to sustainability. For inspiration, check out Rosy Soil’s take on sustainable well-draining potting mixes. It’s a neat way to align your plant care with planet care.
Still not sure how chunky or damp your mix should be? Here’s a quick rundown:
| Component | Role | Preparation Tips |
|---|---|---|
| Orchid or Pine Bark (40%) | Chunky drainage and airflow | Use pea-sized pieces; avoid fine dust |
| Coco Coir (30%) | Retains moisture but allows aeration | Fluff before use; rinse to remove salts if needed |
| Perlite or Pumice (20%) | Lightweight drainage enhancer | Rinse well to remove dust; chunky granules preferred |
| Organic Matter (10%) | Feeds soil biology and improves texture | Use worm castings or compost; avoid excess to prevent sogginess |
To sum it up: preparing your aroid potting mix is about creating a space where roots breathe easy and don’t drown. Take your time mixing the right proportions, get your textures right, and give your plants a welcoming home to stretch their roots into.
Give your mix a feel. Play around, adjust as you go. Your plants will thank you with new leaves, stronger stems, and that unmistakable glow only a happy aroid can show.
For more on the science behind mixing potting soils just right, this guide from Dr. Greenthumbs is a treasure trove of detailed tips you might want to check out.
Step 4: Potting and Caring for Your Aroids Using the Mix
Okay, so you’ve got your aroid potting mix ready—now what? Potting your aroid isn’t just about plopping it into a pot; it’s creating a cozy home that lets those roots breathe, grow, and thrive. Think of it like giving your plant a breathable jacket—not too tight, not too loose.
First off, pick a pot with good drainage holes. This is non-negotiable because your aroids aren’t fans of soggy feet. If the water lingers, root rot is just waiting to crash the party.
When you’re filling the pot, put some of that chunky orchid bark or pumice at the bottom to create a drainage layer. Then, gently nestle your mix in, making sure not to compress it too much. You want it fluffy enough so air dances through and roots don't suffocate.
Have you ever noticed how some aroids come with a bit of moss around their base? It’s not just for looks. A thin layer of sphagnum moss on top can keep moisture steady where new roots start to form. Just keep it light—too much moss and you risk trapping too much water, which can backfire.
Watering Rituals: Finding That Moist But Not Wet Sweet Spot
This might be the toughest part. When do you water? And how much? It’s tempting to say, "whenever you think it looks dry," but with aroids, you want to tune in a little closer.
Here’s the deal: your potting mix should feel moist—not soggy, not bone dry. If the top layer of moss is crunchy, it’s thirsty. If it feels cool and damp, hold off. Remember, the roots like a cycle of drying just enough before the next drink. Kind of like how you wouldn’t want to sit in damp socks all day, right?
The frequency depends on your environment—humidity, temperature, and light. For most indoor growers, watering once a week is a solid starting point. But, if your air is dry like a desert, your aroids might need a sneak midweek sprinkle. Monitoring moisture with your finger is the best free tool you’ve got.
Repotting: When and Why You Should Do It
Ever wonder how often to repot? When your plant starts rooting through the pot holes or the soil feels dense and slow to dry, it’s time to repot. Fresh aroid potting mix breathes new life into your plant and prevents root-rot nightmares caused by old, compacted media.
Don’t stress about doing it exactly every year—pay attention to what your plant’s telling you. If growth slows or leaves look dull, check the roots. Stuck roots mean your plant needs a bigger or fresher home.
Pro tip: When you repot, gently tease those roots a bit to encourage new growth but don’t overdo it. Then water lightly to help the mix settle without drowning those precious roots.
Airflow and Environment: More Than Just Soil
Airflow is the unsung hero in your aroid’s health. Sitting in stagnant air? The risk of fungal and bacterial issues skyrockets. Use a subtle fan aimed to move air around—not blast it—so your plant stays dry enough to avoid rot but cozy enough not to dry out fully.
Plus, don’t shy away from wetting the leaves occasionally. Sure, it might sound risky, but a good mist mimics rainforest vibes where these plants come from. Just make sure the leaves dry within a few hours to keep fungal problems at bay.
Nutrient Boosts: Feeding Your Aroids the Right Way
Your aroid potting mix will feed your plant gently at first, but adding a balanced fertilizer every so often makes a noticeable difference. Something with a mild nitrogen, phosphorus, and potassium mix works well—think of it as a multivitamin for your plant.
Just don’t go overboard. Half the recommended dose is plenty, especially when you’re just starting out. And if you want to dig deeper into how to mix your own perfect blend, check out our guide on creating the ideal anthurium potting mix, which complements this perfectly.
Lastly, every environment is different. The way you care for your aroids might take a little fine-tuning—like adjusting how chunky your mix is or how often you water to fit your home's unique climate. Remember, these plants aren’t just surviving; they want to thrive.
So, grab your mix, your pot, and your patience—your thriving indoor jungle awaits.
For some bonus reading on why airflow and moisture management matter so much, this aroid care insight is a fantastic resource worth bookmarking.
Common Mistakes to Avoid When Using Aroid Potting Mix
Let's be honest: even with the best aroid potting mix, things can go sideways if you’re not careful. It’s like having a great recipe but burning the dish because you left it in the oven too long. You’ve got this nutrient-rich, airy blend that’s supposed to work wonders—but what if your plant still looks sad? Chances are, one of these common slip-ups is tripping you up.
Overwatering in Well-Draining Mixes
Here’s a classic trap: you mix a chunky, well-draining aroid potting mix, full of bark and perlite, and think, “Great drainage—time to water more!” But nope. That mix lets water flow fast, so it's tempting to water frequently. The problem? Aroids hate soggy roots just as much as parched ones. Overwatering with a fast-draining mix can drown those roots cold and slow. It’s like trying to swim with a ton of bricks strapped on.
Watch your watering schedule closely—let the top inch or so dry out before the next splash. And remember, if you’re unsure, it’s usually safer to underwater than overwater. Your roots will thank you—promised.
Neglecting Airflow and Drainage
Speaking of roots breathing, it’s tempting to pack your pot tightly and hope your plant settles in. But suffocating roots? Not cool. Aroid roots crave plenty of airflow around them, which is why your potting mix has chunky bits. If you cram it down too hard or choose a pot without drainage holes, you’re basically sealing your plant’s fate.
Using a container with ample drainage and loosening your mix during repotting helps create that airy environment. If you haven’t considered pot choice yet, this might be the hidden factor behind your plant’s droopiness.
Skipping Regular Mix Refreshes
You might think, “I put in a good aroid potting mix once—done!” But soil isn’t forever. Over time, the components break down, get compacted, and stop draining well. This slowly pushes your roots towards trouble, encouraging root rot and distress.
Refreshing or repotting every 1–2 years isn’t just maintenance—it’s giving your plant a fresh start. Think of it like changing your bedding; comfy and clean roots mean happy leaves.
Adding Too Much Fertilizer to the Mix
Okay, so you’ve got your great potting mix, and you’re feeling generous with fertilizer. But too much of a good thing quickly flips to bad. Over-fertilizing can burn roots, especially in an already nutrient-rich mix. Take it from those who’ve overfed only to watch their aroids shrivel.
The best approach? Stick to half the recommended fertilizer dose and only feed during active growth periods. If your mix already has organic amendments, extra fertilizer might not even be necessary.
Ignoring pH and Water Quality
Last, but definitely not least, don’t overlook the pH and quality of your water. Aroid potting mixes prefer slightly acidic conditions—usually around 5.5 to 6.5 pH. Tap water with high minerals or alkalinity can gradually alter the soil chemistry, messing up nutrient uptake and stressing your plant.
Testing your water or using filtered rainwater can make a surprisingly big difference. It’s a subtle fix, but one that’s saved many an aroid from stubborn nutrient deficiencies.
So, what should you do next? Keep this checklist handy:
- Water only when the soil surface feels dry and avoid watering on a schedule alone.
- Choose pots with drainage and don’t pack your mix too tightly.
- Refresh your potting mix every year or two to keep it fresh and breathable.
- Be gentle with fertilizer—less is more.
- Consider your water source and its pH for the best results.
If you want to dive deeper into mixing tips and detailed potting strategies, this expert guide on crafting the perfect aroid potting mix is a treasure trove. And for troubleshooting root troubles that might trace back to your soil, this detailed resource on handling Anthurium root rot is a must-read.
Avoiding these common mistakes will keep your aroids happy, your roots healthy, and your indoor jungle thriving. Trust me, nothing beats the feeling of leafing through lush, vibrant growth you know is a direct result of care done right.
FAQ
What exactly makes an aroid potting mix different?
Great question. You might think any soil can do, but aroids—like your Anthuriums or Monstera—actually need a mix that breathes and drains well. That means chunky bits like orchid bark, perlite, and some coco coir or sphagnum moss to hold just the right moisture. The trick? It’s about balancing water retention without drowning the roots.
If you’re using plain potting soil, your plant might feel like it’s stuck in quicksand. Roots suffocate, and that’s a slow slide to trouble.
How often should I refresh my aroid potting mix?
Honestly, it depends, but every year or two is a solid rule. Over time, potting mixes break down, get compacted, and lose that airy texture your aroid roots love.
Refreshing your mix isn’t just about swapping dirt; it’s about giving your plant a breath of fresh air—literally. Think about it like changing out your running shoes: comfortable roots, happy plant.
Can I use tap water directly on my aroid potting mix?
Tap water can be okay, but you’ve gotta watch out for minerals and pH levels. Some tap water is hard or alkaline, and over time that messes with soil chemistry, leading to nutrient lockout.
If you notice yellowing leaves or slow growth, maybe your water’s part of the problem. Filtering it, collecting rainwater, or letting tap water sit overnight can really help. It’s an easy swap that lots of aroid lovers swear by.
Why is drainage so crucial in an aroid potting mix?
Because aroid roots hate soggy feet. Too much water, and you’re inviting rot—root rot is like the silent assassin of indoor plants.
Your pot needs enough holes, and your mix should never pack tight. It should look more like a forest floor than a brick. When you water, excess should flow right out, keeping roots happy and healthy.
Should I fertilize my aroid potting mix? How often?
Yes, but gently. Aroids are delicate with nutrients. More fertilizer doesn’t mean bigger leaves—it often means burnt roots or stressed plants.
Think of it as seasoning your favorite dish—you add just enough to bring out flavor. Feed during the growing season with a balanced, diluted fertilizer, about once a month. And always pay attention to how your plant reacts; it’ll tell you if you’re overdoing it.
Is homemade aroid potting mix better than store-bought?
Depends on what you’re after. Making your own lets you customize texture and components, which can feel really empowering.
But store mixes can be a great shortcut if you pick one designed specifically for aroids. Just check what’s inside. Too much peat or dense soil? Pass. Look for chunky, airy stuff that won’t hold water like a sponge.
What’s a quick fix if I suspect my aroid potting mix is hurting my plant?
First, don’t panic. Gently remove the plant, check roots for rot—they’ll be brown and mushy if it’s bad. Then swap your soil for a fresh, airy aroid potting mix.
Water lightly and hold off on fertilizer for a bit. Your plant needs time to bounce back—like nursing a friend through a rough patch. With a little TLC, you’ll see those leaves perk up before you know it.
Conclusion
So, here we are at the finish line. Caring for your aroid isn’t about just dumping soil and hoping for the best. It’s about tuning in—hearing the subtle clues your plant gives through its leaves, its roots, even the way it sits in the light.
Getting your aroid potting mix right is like finding the perfect recipe. Not too wet, not too dense, just airy enough to cradle roots without drowning them. Remember, you’re not just creating a home for your plant; you’re crafting an environment where it can really thrive.
And don’t worry if you slip up—every plant lover has been there, staring at a droopy leaf wondering what went wrong. The good news? Aroids bounce back faster than we expect when you correct their soil and watering routines.
Here’s a little secret: the best aroid potting mix is one that evolves with your plant. Try mixing in bark chunks, charcoal, or perlite until you hit that sweet spot. Watch how your plant responds and adjust accordingly. This connection, this trial and error, it’s part of the fun.
Ready to give your beloved plants the boost they deserve? Start with your soil mix. It just might change everything.