

How to Identify and Fix Magnesium Deficiency in Houseplants
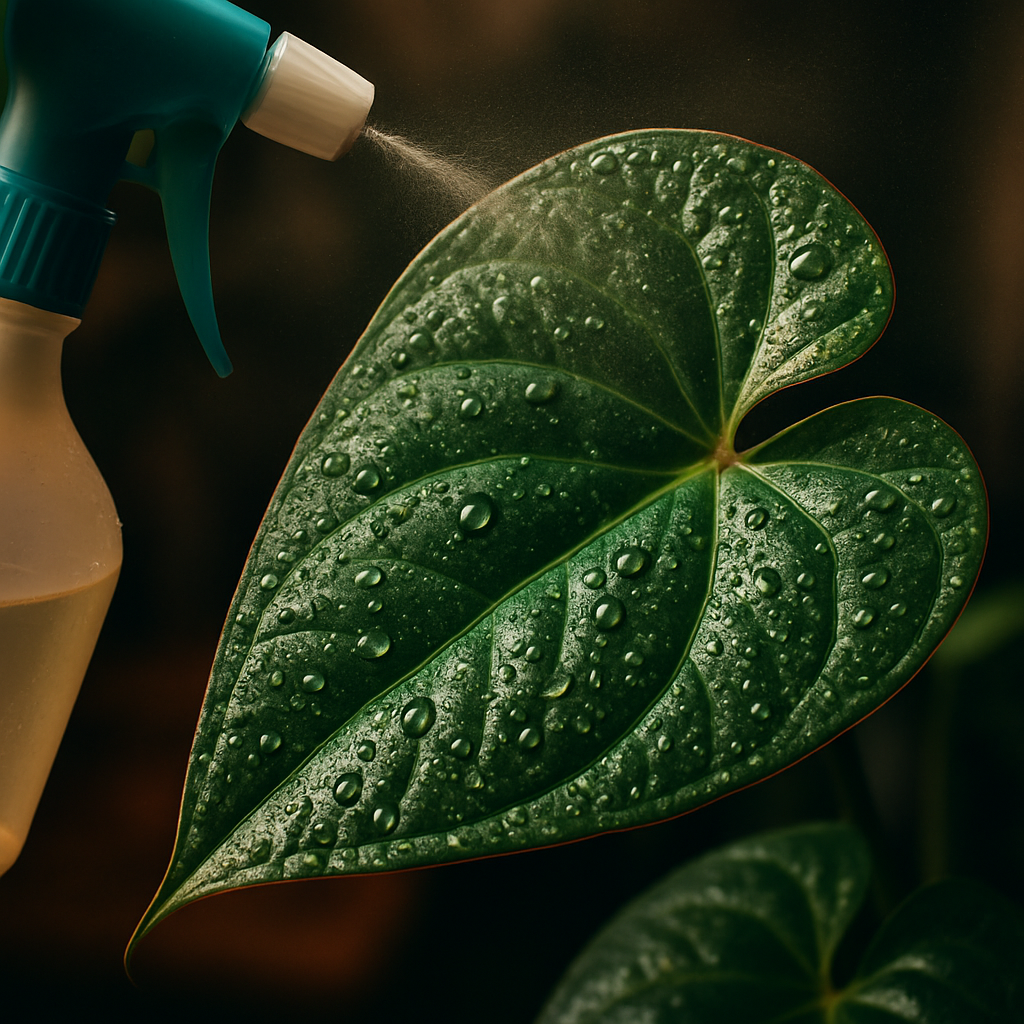
Ever walked past a gorgeous anthurium and thought, “Why are the leaves turning yellow and a little crispy?”
That gut‑wrenching moment of realizing something’s off is the first clue that your plant might be suffering from magnesium deficiency in houseplants.
Magnesium is the quiet hero that helps chlorophyll do its job, turning light into the food your foliage craves. When it’s missing, leaves start showing those classic interveinal yellow patches, and you’ll notice new growth looking pale, almost as if it’s trying to whisper for help.
But don’t panic – you’re not alone. We’ve all stared at a wilted leaf and wondered if we’d done something irrevocably wrong. The good news? Fixing magnesium deficiency is usually as simple as a few thoughtful tweaks to your watering routine or a quick boost with the right feed.
Think about it this way: imagine your plant’s veins are tiny highways delivering nutrients. Magnesium is like the fuel station that keeps traffic moving. When the station runs dry, traffic jams appear as yellowing, and the plant’s energy stalls.
So, what should you look for? First, check the older leaves – they’re the early reporters. You’ll see a translucent yellow between the veins, sometimes with a brown edge. Next, feel the leaf’s texture; magnesium‑starved foliage often feels a bit brittle, especially on anthuriums that love humidity.
Now that you’ve spotted the signs, the next step is easy: give your plant a magnesium boost. A gentle, water‑soluble magnesium supplement mixed into your regular feed, or a homemade Epsom salt solution (one teaspoon per gallon), can revive those tired leaves in just a week or two.
And remember, it’s not just about fixing a deficiency – it’s about preventing it. Using a well‑balanced, custom soil‑less mix designed for aroids, like the ones FAS offers, keeps magnesium levels steady and your plants thriving.
Ready to bring back that vibrant green? Let’s dive deeper into how to diagnose, treat, and prevent magnesium deficiency in houseplants, so your indoor jungle stays lush and happy.
TL;DR
If your anthurium’s older leaves look yellow between the veins and feel brittle, you’re dealing with magnesium deficiency in houseplants.
A quick fix is a gentle Epsom-salt feed (one teaspoon per gallon) plus a balanced, custom aroid mix, which will quickly restore vibrant green in just a week or two.
Step 1: Diagnose Magnesium Deficiency Symptoms
You know that moment when you run your fingers over a leaf and it feels a little like dry paper, and you think, “Did I over‑water? Did I forget to mist?” That subtle, uneasy feeling is often the first clue you’re dealing with magnesium deficiency in houseplants.
Magnesium is the quiet workhorse behind chlorophyll. When it’s lacking, the plant can’t turn light into food efficiently, so the older leaves – the ones that have been ferrying nutrients the longest – start waving a yellow‑green flag.
Spot the classic interveinal yellowing
Look at the older, lower leaves on your anthurium. You’ll see a translucent, buttery yellow that runs between the veins, while the veins themselves stay a darker green. It’s like the leaf is wearing a yellow sweater over a green skeleton.
One of my fellow aroid enthusiasts showed me her ‘new‑growth’ pothos that suddenly developed the same pattern. The younger leaves stayed bright, but the older ones turned that unmistakable shade. That contrast is a dead‑giveaway that magnesium, not nitrogen, is the missing piece.

Feel the texture, watch the new growth
Beyond color, magnesium‑starved foliage often feels a bit brittle, especially on aroids that love humidity. Gently bend a leaf; if it snaps with a faint crack rather than flexing, that brittleness is a symptom.
At the same time, keep an eye on the newest shoots. If they’re pale, slower to unfurl, or the veins look washed out, you’re likely seeing the early stages of a deficiency before the yellowing even spreads.
Quick checklist to confirm what you’re seeing
- Older leaves display interveinal yellowing, veins stay green.
- Leaf edges may develop a brown, crispy margin.
- Texture feels slightly dry or brittle to the touch.
- New growth appears paler or slower than usual.
- No obvious signs of over‑watering (no soggy soil, no root rot).
If you tick three or more of those boxes, magnesium deficiency is the most likely culprit.
Take a simple, low‑cost test
Many garden centers sell a basic micronutrient test strip that includes magnesium. Dip the strip in a leaf sap extract (just crush a small piece of leaf in water) and compare the color change to the chart. It’s not lab‑grade, but it’s quick enough to give you confidence before you invest in a full soil analysis.
For a deeper dive, the GrowVeg guide on magnesium deficiency in plants explains how to collect a leaf tissue sample and send it to a university lab for precise results.
When to bring in the pros
If you’ve run the visual checklist, tried a home test, and the symptoms persist, consider a professional soil or leaf tissue analysis. A modest fee can pinpoint the exact magnesium concentration and tell you if other nutrients are also out of balance.
The Old Farmer’s Almanac article on magnesium deficiency provides a clear overview of interpreting those lab results and adjusting your feeding schedule accordingly.
So, what should you do next? Grab a leaf, run through the checklist, and if the signs line up, treat the plant within the next 24‑48 hours. A gentle Epsom‑salt feed (one teaspoon per gallon of water) mixed into your regular watering will usually start turning those yellow patches back to healthy green within a week.
Remember, diagnosing is half the battle. The more precisely you spot the symptoms, the quicker you can get back to enjoying the glossy, vibrant foliage you fell in love with.
Step 2: Test Soil and Leaf Tissue for Magnesium Levels
Alright, you’ve spotted the classic yellow‑between‑veins look on your anthurium and you’ve given it a quick Epsom‑salt rinse. The next logical move? Find out exactly how much magnesium is hanging out in the soil and in the leaf itself. Knowing the numbers lets you treat the problem without over‑doing it.
Why you need both soil and tissue tests
Soil tests tell you what’s available in the growing medium, but they don’t reveal whether the plant can actually pull it into its cells. Leaf‑tissue analysis, on the other hand, is the plant’s report card – it shows the magnesium concentration that’s truly reaching the photosynthetic machinery.
Think of it like a car’s fuel gauge versus the dashboard warning lights. You could have plenty of fuel (magnesium in the soil) but a clogged filter (root‑zone imbalance) that stops it from getting to the engine.
Step‑by‑step soil‑sampling guide
1. Gather tools. You’ll need a clean trowel, a plastic bucket, and a zip‑lock bag. Avoid metal tools that could contaminate the sample.
2. Pick the right spot. For a potted anthurium, sample from the root zone – about 2–3 inches deep, where the roots actually grow. If you have a larger container, take three small scoops from different sides and mix them together.
3. Dry the sample. Spread the soil on a newspaper and let it air‑dry for 24 hours. No oven, no heat – just room temperature. Moisture skews the magnesium reading.
4. Label and send. Most garden centers or local extension offices accept a 100‑gram sample. Write “magnesium” on the bag so the lab knows which nutrient you’re interested in.
5. Interpret the results. A healthy houseplant substrate usually holds 30–60 ppm (parts per million) of exchangeable magnesium. Anything below 20 ppm is a red flag.
Leaf‑tissue sampling made easy
1. Select the right leaf. Choose a mature leaf that shows the yellowing but isn’t fully necrotic. The middle of the leaf blade gives the most reliable data.
2. Clip a small piece. Cut a 2‑inch strip from the leaf, avoiding the edges where damage can concentrate.
3. Freeze or dry. If you can get the sample to a lab within 24 hours, place it in a zip‑lock bag and keep it cool. Otherwise, dry it in a low‑heat oven (150 °F) for a few hours.
4. Send to a diagnostic lab. Many universities and commercial labs offer “leaf tissue analysis” packages. Mention magnesium specifically on the order form.
5. Read the report. For aroids, a magnesium concentration of 0.2–0.4 % (dry weight) is typical. Below 0.15 % signals a deficiency.
Real‑world examples
One aroid hobbyist in Seattle sampled a premium bark mix and got a soil magnesium reading of 12 ppm. The leaf test showed 0.11 % magnesium. After applying a low‑dose magnesium‑rich fertilizer – specifically the MSU K‑Lite blend that contains 3 % water‑soluble magnesium – the next tissue report jumped to 0.26 % and the yellow patches faded within two weeks. You can read the full formulation details on the MSU K‑Lite fertilizer page.
Another gardener in Austin used a DIY soil test strip kit and saw a reading of “low” for magnesium. A quick lab tissue analysis confirmed 0.13 % magnesium. By mixing one teaspoon of Epsom salt per gallon of water and watering every five days, the plant’s leaf magnesium rose to 0.19 % after three applications – just enough to stop the spread of yellowing. The GrowVeg guide on magnesium deficiency explains why that modest dose works for most houseplants.
Tips from the pros
• Don’t over‑test. Soil magnesium levels change slowly, so testing twice a year (spring and fall) is usually sufficient.
• Combine with pH check. Magnesium uptake drops sharply below pH 5.5 in most aroid mixes. A simple pH meter can save you a lot of guesswork.
• Use a balanced fertilizer. Products like K‑Lite are formulated with calcium and magnesium in ratios that mimic natural rainforest litter, preventing the “potassium overload” many growers encounter.
Now you have a clear, repeatable process: grab a soil scoop, clip a leaf, send them off, and let the numbers guide your next feeding. It may feel a bit scientific, but the payoff is a thriving, glossy anthurium that stays green for the long haul.
Step 3: Choose the Right Magnesium Supplement
Now that you’ve got the numbers from your soil and leaf tests, the next question is simple: what do you actually feed your anthurium? It’s tempting to reach for the biggest bag of “all‑purpose” fertilizer you can find, but magnesium is a picky guest. It wants the right form, the right concentration, and the right timing. Let’s walk through how to pick a supplement that actually solves the problem without overloading your plant.
What forms of magnesium actually work?
In the plant‑world you’ll see three main families: magnesium sulfate (Epsom salt), magnesium chelate (often magnesium EDTA or DTPA), and magnesium oxide. Magnesium sulfate is water‑soluble and fast‑acting – great for a quick green‑up. Chelated magnesium stays in solution longer, so it’s better for a steady drip or weekly feeding. Magnesium oxide is cheap but barely dissolves, so it’s best for soil mixes where you want a slow release over months.
Which one should you choose? If your tissue test shows a mild dip (0.15‑0.20 % Mg), a low‑dose Epsom‑salt rinse works wonders. If the deficiency is severe or you’ve got a mix that drains quickly, go for a chelated product. And if you’re formulating your own potting mix, sprinkle a handful of magnesium oxide into the bark blend.
Real‑world examples
Case study: Jenna in Portland grew a glossy anthurium in a peat‑coconut mix. Her leaf test read 0.12 % magnesium. She switched to a liquid chelated magnesium feed at 0.5 ml per gallon, applied once a week. After three weeks her leaf Mg climbed to 0.28 % and the yellow interveinal spots vanished.
Another example: Marco in Miami prefers a “set‑and‑forget” approach. He adds ¼ tsp of magnesium oxide to every new batch of bark mix. The slow‑release keeps his aroids in the 0.30‑0.35 % range for the whole season without any extra watering tricks.
Actionable checklist – pick your supplement
| Form | Speed of uptake | Best use case |
|---|---|---|
| Magnesium sulfate (Epsom salt) | Immediate (hours‑days) | Quick correction, low‑dose foliar or water‑soluble feeds |
| Magnesium chelate (EDTA/DTPA) | Steady (days‑weeks) | Regular watering schedule, hydroponic or fast‑draining mixes |
| Magnesium oxide | Slow (weeks‑months) | Soil amendment, long‑term potting mix preparation |
Use this table as a quick reference when you stand in the aisle staring at a dozen bottles. Ask yourself: “Do I need an instant fix or a long‑term buffer?” The answer will point you to the right column.
How to apply each type
Epsom salt solution: Dissolve one teaspoon of Epsom salt in one gallon of water. Water your anthurium with this solution every five days for three applications, then revert to normal water. Watch the new leaves turn a richer green within a week.
Liquid chelated magnesium: Follow the manufacturer’s label – usually 0.5 ml per gallon of water. Add it to your regular watering routine once a week. Because it stays in solution, you’ll see a gradual improvement over two to three weeks.
Magnesium oxide mix‑in: For a 5‑liter batch of bark, sprinkle about ¼ tsp of finely ground magnesium oxide, mix thoroughly, and moisten. This creates a reservoir that releases magnesium slowly as the plant pulls water.
Pro tip: Combine magnesium with a small amount of calcium (around a 2:1 Ca:Mg ratio). Calcium helps the roots absorb magnesium more efficiently – a trick many commercial aroid mixes use.
Where to source quality supplements
Look for products that list the exact percentage of elemental magnesium. Avoid “magnesium blend” formulas that hide the real concentration behind marketing jargon. If you’re buying online, check reviews for consistency – a reputable brand will have transparent lab‑tested specs.
And if you’re still unsure which product fits your routine, our how to create the ideal anthurium potting mix for thriving aroids guide walks you through building a custom substrate that includes the right magnesium source from the start.
Finally, keep a simple log. Note the supplement type, dosage, date, and any visual changes you see. After a month you’ll have a data set that tells you exactly what your plant prefers.
Does this feel overwhelming? Not really. Pick one form, follow the step‑by‑step application, and watch your anthurium bounce back.
Step 4: Apply Magnesium Correctly and Monitor Recovery
You've finally picked a supplement, so now it's time to actually get it into the plant. That's the moment most hobbyists dread – will I over‑do it? Will the leaves ever turn green again?
Don't worry. If you follow a few simple steps, you can treat magnesium deficiency in houseplants without turning your anthurium into a chemistry experiment.
Mix the right dose
Start with the concentration the label suggests, then cut it in half. Most growers find that a ½‑strength solution is enough to nudge the plant back on track without burning the roots. For Epsom salt, that's about one teaspoon per gallon of water; for a chelated liquid, 0.25 ml per gallon works fine.
Why the dilution? basic fertilizing principles tell us that houseplants are sensitive to excess salts, especially in a closed pot environment.
Measure with a kitchen spoon or a small syringe – precision beats guesswork.
How to feed
Water the plant first until the soil is evenly moist. Then, slowly pour the magnesium solution over the top, letting it soak in. Avoid splashing the foliage unless you're doing a foliar spray, which is a good trick for quick green‑ups.
Set a schedule: every five days for a three‑application burst if you’re using Epsom salt, or once a week for chelated feeds. After the initial round, switch back to your regular balanced fertilizer at half strength.
So, what should you keep an eye on?
Watch the signs
New growth is the best indicator. Look for fresh leaves that are a deeper, richer green and free of the interveinal yellowing you saw before.
If you notice the edges turning brown, that usually means you went too strong – back off and water more.
Another reliable cue is leaf turgor. Healthy leaves feel firm, not papery.
According to magnesium deficiency symptoms guide, a noticeable improvement often appears within one to two weeks of consistent feeding.
Keep a simple recovery log
Grab a notebook or a spreadsheet and jot down the date, type of supplement, dosage, and a quick visual rating (e.g., 1‑5) of leaf colour.
After a month you’ll have a tiny data set that tells you exactly what your plant prefers – no fancy lab needed.
And if you ever feel like you’re stuck, remember that a few extra waterings with plain water can flush out excess salts before you try again.
Bottom line: apply a modest, measured dose, watch the plant’s response, and record what you see. With that loop in place, magnesium deficiency in houseplants becomes a fix you can repeat with confidence.
Step 5: Prevent Future Deficiencies with Balanced Care
Make a simple “magnesium calendar”
And here’s a tiny habit that can save you weeks of guesswork: mark the day you feed magnesium on a wall calendar, then set a reminder for 30 days later. The idea isn’t to treat every plant like a lab experiment, it’s to create a rhythm that matches the slow release of most soils.
When the reminder pops up, glance at your leaf‑turgor and colour. If the newest growth still looks a shade lighter than the older leaves, add a half‑strength Epsom‑salt rinse. If everything looks vibrant, skip the feed and just water as usual.
Balance magnesium with calcium and potassium
Think of magnesium as the middle child in the nutrient family – it thrives when its older sibling calcium and its younger sibling potassium are both present in the right ratios. A 2:1 calcium‑to‑magnesium mix is a good rule‑of‑thumb for most aroids.
One grower I know, Maya in Austin, tacks a pinch of crushed eggshells (calcium) into her weekly watering routine and sees fewer “yellow‑between‑veins” episodes. It’s not magic, it’s just keeping the nutrient cocktail well‑blended.
Use a balanced, slow‑release fertilizer
Most commercial “all‑purpose” blends over‑dose potassium, which can lock magnesium out of the root zone. Look for a formula that lists magnesium as a named ingredient, not hidden in a “micronutrient blend.” For example, the “K‑Lite” mix we recommend contains a 3:2:1 N‑P‑K ratio plus 0.5 % elemental magnesium, which mirrors the mineral profile of rainforest litter.
Apply the fertilizer at half the label rate every four weeks. That gentle steady feed gives the plant time to absorb magnesium without building up salts that could scorch the roots.
Adjust watering and flushing habits
Water quality matters more than most people realise. Hard water can leave calcium deposits that interfere with magnesium uptake. If you notice a white crust on the pot rim, try a weekly “flushing” – pour a litre of distilled or rain water through the soil and let it drain completely.
Research from the Royal Horticultural Society shows that regular flushing reduces salt buildup by up to 40 %, which directly improves magnesium availability (RHS guidance on nutrient management).
Track, tweak, repeat
Grab a cheap spreadsheet or even a bullet‑journal page. Log the date, type of magnesium source, dosage, and a quick visual rating from 1 (pale) to 5 (deep green). After three months you’ll see a pattern – maybe you’re over‑feeding in summer when the plant’s growth spurt naturally draws more magnesium, or under‑feeding in winter when the soil dries out slower.
And don’t be afraid to experiment with a “micro‑dose” approach: ¼ teaspoon of Epsom salt per gallon of water every two weeks instead of a single larger feed. One hobbyist in Seattle reported a steadier colour improvement and fewer leaf‑tip scorch events after switching to this micro‑dosing schedule.
Expert tip: test the soil once a year
Even if you’re diligent about feeding, soil chemistry can shift over time. A simple DIY test kit (available at most garden centres) will tell you if magnesium is slipping below 0.15 % – the threshold where most houseplants start to show symptoms.
According to The Spruce’s guide to magnesium deficiency, a single soil test can prevent a cascade of yellowing leaves that would otherwise require multiple corrective applications.
Action checklist for balanced care
- Mark a “magnesium feed” day on your calendar and set a 30‑day reminder.
- Blend a 2:1 calcium‑to‑magnesium ratio (eg. crushed eggshells + a pinch of Epsom salt).
- Switch to a balanced fertilizer that lists magnesium explicitly; use half‑strength every four weeks.
- Flush with distilled or rain water once a month to avoid salt buildup.
- Log each feed and visual rating; adjust dosage after three months based on trends.
- Run a DIY soil test annually to confirm magnesium stays above 0.15 %.
Bottom line: prevention is just as simple as the correction steps you’ve already mastered. By setting a light schedule, balancing complementary nutrients, and keeping an eye on water quality, you’ll keep magnesium deficiency in houseplants from ever becoming a recurring headache.
Conclusion
After all the testing, mixing, and watching those leaves turn greener, you might wonder if the effort was worth it.
Honestly, the answer is a resounding yes. By catching magnesium deficiency in houseplants early and treating it with a light, balanced routine, you prevent the dreaded yellow‑veined look that makes any aroid lover cringe.
Remember the simple checklist: set a monthly reminder, blend a 2:1 calcium‑to‑magnesium mix, use a half‑strength balanced fertilizer, flush with rain water, log each feed, and run an annual soil test. Stick to those steps and the plant will reward you with robust new growth.
So, what’s the next move? Grab a notebook, mark today’s date, and schedule your first magnesium feed for next week. Trust the process – you’ll see the change within a couple of weeks, and the habit will become second nature.
Finally, enjoy the confidence that comes with knowing you’ve mastered magnesium deficiency in houseplants. Your anthuriums and other aroids will thrive, and you’ll spend less time troubleshooting and more time admiring those vibrant leaves.
If you’re looking for a hassle‑free magnesium boost, consider FAS’s organic magnesium chelate – it dissolves easily and pairs nicely with their custom soil‑less mixes. Sharing your results in a plant forum can also spark new ideas and keep you motivated.
FAQ
What are the first signs that my houseplant is suffering from magnesium deficiency?
Usually the plant will start showing interveinal yellowing – the veins stay green while the tissue between them turns a pale, almost lemon‑shade. You might also notice older leaves becoming thinner and a little limp, like they’re running low on energy. In aroids, those “yellow‑between‑veins” patches are a classic giveaway, and they often appear before any tip burn or overall stunting.
How can I confirm whether magnesium is really the problem?
The easiest way is a quick soil‑test kit that measures magnesium concentration; most garden centres carry a simple strip or liquid test that tells you if you’re below the 0.15 % threshold. If you don’t have a kit, compare the visual symptoms with a trusted guide – if the pattern matches the interveinal yellowing and leaf turgor feels a bit soft, magnesium is the likely culprit.
What’s the most effective method to feed magnesium to aroids such as anthuriums?
For aroids, a diluted Epsom‑salt solution works like a charm. Mix about ½ teaspoon of Epsom salt per gallon of water, water the plant until the soil is evenly moist, then pour the magnesium solution over the top. You can also use a chelated magnesium liquid feed at the manufacturer’s recommended rate – it’s absorbed faster and won’t leave a crusty residue.
Can I over‑feed magnesium, and what would happen if I do?
Yes, too much magnesium can create a salt buildup that blocks other nutrients, especially calcium and potassium. You’ll see brown edges or tip scorch, and the soil may feel crusty. If that happens, flush the pot with a generous amount of distilled or rain water to leach the excess out, then resume feeding at half the previous dosage.
How often should I schedule magnesium feeds to keep my plants healthy?
Think of it as a light, regular habit rather than a big one‑off. A good rule of thumb is a modest feed every four weeks during the active growing season, and once every eight weeks in winter when growth slows. Pair each feed with a half‑strength balanced fertilizer so you’re not overloading the root zone.
Does the quality of my tap water affect magnesium uptake?
Absolutely. Hard water is high in calcium and can interfere with magnesium absorption, while softened water often contains sodium that stresses roots. If you notice a white crust on the pot rim, switch to rain water or distilled water for your magnesium feed and do a monthly flush to keep salts from accumulating.
Are there any organic magnesium products you’d recommend for aroids?
FAS’s organic magnesium chelate is a solid choice – it dissolves cleanly, is free of synthetic additives, and mixes well with their custom soil‑less mixes. Because it’s chelated, the magnesium stays available to the plant longer, reducing the need for frequent applications. Pair it with a light calcium source like crushed eggshells for a balanced nutrient cocktail.