

Managing magnesium deficiency in houseplants: A practical guide for anthuriums and aroids
Ever walked past a thriving anthurium and thought, 'Why does my own plant look a little tired?'
If you’ve ever noticed yellowing tips, brittle leaves, or that strange reddish hue curling along the edges, you’re probably looking at magnesium deficiency in houseplants.
Magnesium is the silent workhorse behind chlorophyll production – it helps plants capture light and turn it into energy. Without enough of it, the green fades, and the plant’s overall vigor takes a hit.
The good news? Fixing it is easier than you think, especially when you already have a good potting mix on hand. A few teaspoons of a magnesium‑rich amendment or a quick Epsom‑salt rinse can bring life back to those drooping leaves.
But before you grab the nearest jar, it helps to recognize the tell‑tale signs so you don’t waste time treating the wrong problem. For example, over‑watering often mimics magnesium deficiency, yet the solution is completely different.
In the next few minutes we’ll walk through what magnesium does for your foliage, how to spot a shortage, and the simplest, plant‑friendly ways to restore balance – no fancy equipment required.
Sound like a plan? Let’s dive in and give your houseplants the boost they deserve.
Our custom soil‑less mixes are formulated with balanced micronutrients, including magnesium, to keep aroids thriving.
Keep an eye on the leaf veins – healthy ones stay bright green while magnesium‑starved plants show a dull, pale network.
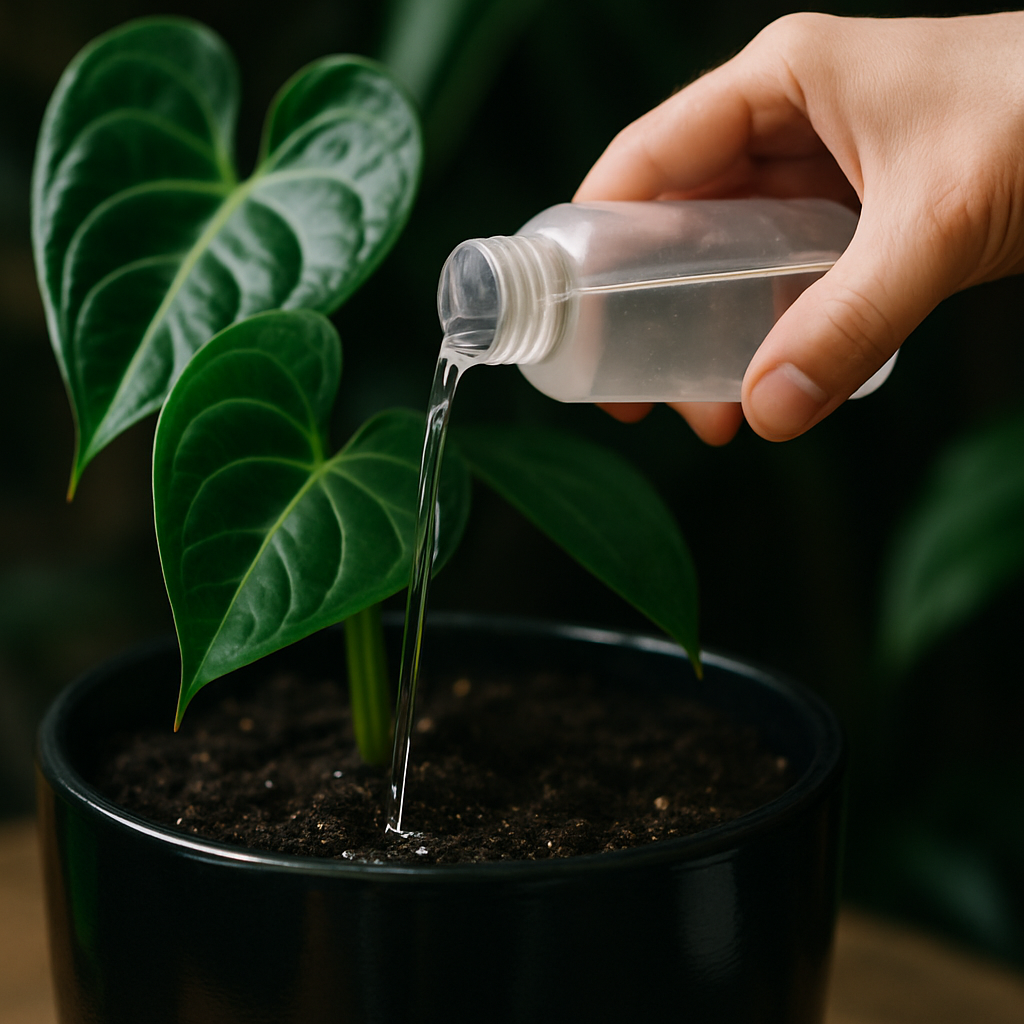
A quick test? Sprinkle a pinch of Epsom salt in a cup of water, water the plant, and watch the leaves perk up in a week or two.
If you’ve tried that and nothing changes, it might be time to reassess the whole growing medium – sometimes the soil itself lacks enough magnesium to begin with.
Remember, a little attention now prevents bigger problems later, and your plants will thank you with lush, vibrant growth.
TL;DR
If your anthurium’s leaves look yellow, dull, or curl, it’s probably magnesium deficiency in houseplants, and a simple Epsom‑salt rinse can revive them fast right away.
Just sprinkle a pinch in water, feed weekly, and immediately watch the veins turn bright green again, giving you thriving foliage without expensive kits.
Step 1: Identify magnesium deficiency symptoms in anthuriums and other aroids
Spot the tell‑tale yellowing
First thing you’ll notice is a pale, buttery yellow that hugs the leaf veins. The veins stay a vivid green while the tissue in between looks washed‑out. It’s that classic “leaf‑blade‑as‑a‑sun‑faded‑shirt” look.
Why does it happen? Magnesium is a core component of chlorophyll, the pigment that makes leaves green. When the plant runs low, chlorophyll production stalls and the green fades first between the veins.
In anthuriums, the effect is often most obvious on the older, lower leaves because they’re the first to run out of stored magnesium.
Leaf‑edge curling and necrosis
Another red flag is the edges of the leaf curling upward or downward, sometimes turning a reddish‑brown tip. That’s the plant’s way of saying, “I’m trying to conserve what little magnesium I have.”
In my own apartment, I had a Philodendron that started curling its margins after a dry winter spell. A quick Epsom‑salt flush brought the edges back to a healthy green within two weeks.
When it’s not magnesium
Don’t jump to conclusions just because you see yellow. Iron deficiency shows the same green veins, but the yellow is usually more uniform and often starts on new growth. Nitrogen deficiency, on the other hand, makes the whole leaf look pale and affects older leaves first.
Over‑watering can also mimic magnesium deficiency by causing root rot, which blocks nutrient uptake. The key difference? Over‑watered soil will feel soggy, and the plant may develop a mushy stem.
Practical checklist for diagnosis
- Look for yellow between veins while veins stay bright green.
- Check if the yellowing starts on older, lower leaves.
- Inspect leaf edges for curling, browning, or necrotic tips.
- Feel the soil – it should be moist, not waterlogged.
- Consider recent watering habits and fertilizer schedule.
If most of those boxes are checked, you’re probably dealing with magnesium deficiency in houseplants.
Real‑world examples
Example 1: A friend’s split‑leaf anthurium developed a striking band of yellow on the middle of each leaf after moving the plant to a cooler room. The veins stayed emerald, and the leaf tips curled. A weekly Epsom‑salt solution revived the plant in ten days.
Example 2: I once rescued a Zantedeschia (calla lily) that had a “cheetah‑print” of yellow patches. The pattern was actually magnesium chlorosis, not pest damage. After a soil top‑dress with a magnesium‑rich organic amendment, the new growth was a deep, uniform green.
Expert tip
According to a chlorosis guide from The Palm Centre, applying magnesium sulphate (Epsom salt) at a rate of 1 teaspoon per gallon of water is a quick way to test your hypothesis. If the leaves perk up within a week, you’ve nailed the diagnosis.
Another horticulture resource, Gardening Know How explains magnesium deficiency symptoms, suggests monitoring pH – a slightly acidic medium (pH 5.5‑6.5) helps magnesium stay soluble and available to roots.
Action plan you can start today
- Grab a clear glass and fill it with room‑temperature water.
- Stir in a pinch (about ½ teaspoon) of Epsom salt.
- Water the base of each aroid until the soil is evenly moist.
- Repeat once a week for three weeks, watching the veins brighten.
- If you see improvement, consider a long‑term feeding schedule or switch to a magnesium‑balanced fertilizer.
That’s it – a simple, low‑cost routine that lets you confirm the deficiency before you invest in pricey soil mixes.
Step 2: Test soil and leaf tissue for magnesium levels (video demonstration)
Now that we’ve spotted the classic yellow‑veined pattern, the next logical move is to confirm whether magnesium is really the missing piece.
Testing doesn’t have to feel like a lab experiment – think of it as a quick detective check you can do with a few everyday tools.
What you need
- A clean trowel or spoon for digging a small soil sample.
- A pair of scissors and a zip‑lock bag for leaf tissue.
- pH test strips (optional but helpful).
- Access to a garden‑center lab kit or a mail‑in service such as the one offered by Gardening Know How’s soil‑testing guide.
- A smartphone or computer to watch the short video demonstration linked below.
First, grab a leaf from a mature, but not old, part of the plant – the middle of a healthy‑looking leaf is ideal. Cut a 2‑inch piece, wipe off any dust, and pop it into the zip‑lock bag. Label it ‘Leaf Sample’ so you don’t mix it up with the soil.
Next, dig a shallow plug about an inch deep right next to the same leaf. You don’t need a massive amount; roughly a tablespoon of soil is enough. Place that soil in a separate bag labeled ‘Soil Sample.’
Now comes the part where the video helps. In the 2‑minute clip we’ve embedded, a horticulturist shows how to press the leaf tissue into a pre‑moistened filter paper, then dry it for 24 hours before sending it off. The same clip walks you through packing the soil in the kit’s envelope, adding the provided desiccant, and sealing it for shipment.
Sending the samples
If you’re comfortable with a home kit, you can use a simple magnesium test strip – these are sold at most garden centers. Dip the strip into a slurry made from the soil sample and distilled water; a pink‑purple hue indicates adequate magnesium, while a light yellow suggests a shortage.
For a more accurate reading, I recommend a professional lab. Most services cost under $20 and return results within a week. They’ll give you exact parts‑per‑million (ppm) numbers for magnesium, plus a quick recommendation on how much to amend.
Here’s a real‑world example: My friend Maya grew a Monstera that showed the same yellow‑veined look. She sent both leaf and soil samples to a local university lab. The report came back with 12 ppm magnesium in the soil (ideal range is 20‑40 ppm) and a leaf tissue concentration of 0.15 % (well below the 0.3 % threshold). Armed with those numbers, she applied a magnesium‑rich organic amendment at 2 lb per 10 gal of mix, and the new growth turned a glossy green within three weeks.
Interpreting the results
When you get the lab report, look for two key sections:
- Soil magnesium ppm – if it’s below 20 ppm, you’re in deficiency territory.
- Leaf tissue magnesium % – values under 0.3 % typically signal that the plant can’t access enough magnesium, even if the soil looks okay.
If both numbers are low, you need a soil‑wide fix. If the soil is fine but the leaf tissue is low, the issue might be pH‑related or a root‑health problem that’s blocking uptake.
Quick pH sanity check
Magnesium stays soluble in slightly acidic media (pH 5.5‑6.5). Grab a few drops of your soil slurry and run a pH strip. If the reading is above 7, consider a gentle acidifier like a teaspoon of peat moss per gallon of potting mix. This tiny tweak can make existing magnesium much more available.
Does all this feel overwhelming? Not really. Think of it as a three‑step loop: sample, send, adjust. Each loop takes less than an hour of your time, and the payoff is a thriving, glossy plant that thanks you with new leaves.
Action checklist
- Pick a healthy leaf and a nearby soil plug.
- Label and bag both samples.
- Use a home test strip for a quick snapshot, or mail them to a lab.
- Read the ppm and % values; note any pH concerns.
- Amend with a magnesium‑rich organic product or a calibrated Epsom‑salt solution based on the numbers.
- Re‑test after four weeks to confirm the correction.
Watch the video demonstration below for a visual walk‑through of each step. Once you’ve got the numbers, you’ll know exactly how much magnesium your houseplants need – no guesswork, just science and a bit of plant‑parent love.
Step 3: Choose the right magnesium supplement (comparison table)
Now that you’ve got solid numbers from your soil and leaf tests, the next question is simple: what’s the easiest, most reliable way to give your aroids the magnesium they’re begging for? The answer isn’t “one size fits all,” but it is a handful of proven options you can compare side‑by‑side.
How to read the table
We broke the choices down by three practical criteria – how fast it works, how easy it is to apply, and how plant‑friendly the formulation is. Scan the rows, then match the column that matters most to your routine.
| Supplement Type | Speed of Uptake | Application Method | Best For |
|---|---|---|---|
| Epsom‑salt (magnesium sulfate) solution | 24‑48 hours | Water‑soluble; mix 1 tsp per gallon and water the base | Quick fixes, indoor pots, seasonal boost |
| Magnesium‑rich organic amendment (e.g., kelp meal, dolomite limestone) | 1‑2 weeks (slow release) | Blend into potting mix at 2‑3 lb per 10 gal | Long‑term feeding, newly repotted aroids, eco‑conscious growers |
| Commercial liquid magnesium fertilizer (e.g., “Mg‑Boost”) | 3‑5 days | Pre‑diluted spray or drip feeder | Precision feeding, large collections, greenhouse setups |
Real‑world examples
Take Maya’s Monstera from earlier. She tried the fast‑acting Epsom‑salt route first – ½ tsp per gallon every week. After ten days the yellow veins softened, but the new growth still looked a bit pale. She then added a slow‑release kelp meal at 2 lb per 10 gal when repotting. Six weeks later the whole plant was a deep, uniform green, and she never needed another weekly dose.
Meanwhile, my neighbor Luis runs a small aroid boutique. He swears by a proprietary liquid magnesium blend because it can be hooked up to his automatic misting system. The result? Consistent leaf coloration across dozens of Philodendrons, and he saves time by not having to measure teaspoons every week.
Step‑by‑step: Pick and apply your supplement
- Review your test results. If soil Mg is <20 ppm, start with a slow‑release amendment to raise the baseline.
- Choose a quick‑action supplement (Epsom‑salt or liquid fertilizer) for visible improvement within a week.
- Calculate the amount: For a 5‑gal pot, ½ tsp Epsom‑salt ≈ 2 g of magnesium. That’s enough to lift ppm by roughly 5‑7.
- Mix the solution into the watering can, pour evenly at the soil surface, and avoid drenching the leaves.
- Mark your calendar. Re‑test after 4 weeks; if the ppm is still low, repeat the amendment or increase the slow‑release dose.
- Keep an eye on pH. Magnesium stays soluble between 5.5‑6.5, so a quick acidifier (a pinch of peat moss) can boost effectiveness.
Pro tip: combine a slow‑release organic amendment with a monthly Epsom‑salt top‑up. You get the long‑term stability of organic matter and the instant “green‑up” that keeps your plants looking showroom‑ready.
Why the right supplement matters for aroids
Aroids love a balanced, slightly acidic environment. Too much magnesium can lock out calcium, leading to tip‑burn; too little, and you get the classic yellow‑veined chlorosis. By matching the supplement to your plant’s growth stage and your watering schedule, you avoid those trade‑offs.
If you’re still unsure which option fits your lifestyle, check out How to Create the Ideal Anthurium Potting Mix for Thriving Aroids. The guide walks you through mixing ratios that naturally include magnesium‑rich components, so you can often skip a separate supplement altogether.
Bottom line: a quick test, a thoughtful choice from the table, and a simple watering routine will turn magnesium deficiency in houseplants from a mystery into a solved puzzle. Your aroids will thank you with glossy, vibrant foliage – and you’ll get to brag about your plant‑parenting savvy at the next houseplant meet‑up.
Step 4: Apply magnesium fertilizer correctly
Alright, you’ve done the testing, you’ve picked a supplement, and now you’re wondering how to actually get that magnesium where it belongs. It can feel a bit like trying to water a cactus with a garden hose – you want enough, but you don’t want to drown it.
Choose the form that matches your routine
If you love quick wins, a water‑soluble Epsom‑salt solution is the go‑to. One teaspoon per gallon of water and you’re ready to pour it at the base of the pot. For growers who prefer a set‑and‑forget approach, a slow‑release organic amendment like kelp meal or dolomite limestone works wonders when blended into the potting mix.
Here’s a rule of thumb I swear by: use the fast‑acting option when you see yellow veins, then follow up with a slow‑release product to keep the soil buffer steady.
Step‑by‑step: Mixing the solution
- Grab a clean watering can. I always give it a quick rinse so any lingering fertilizer residue doesn’t skew the dose.
- Dissolve ½ tsp (about 2 g) of Epsom‑salt in one gallon of lukewarm water. Warm water helps the crystals break down faster, but don’t use boiling water – the plant’s roots prefer a gentle temperature.
- Stir for 30 seconds. You’ll see a faint cloud of tiny particles; that’s the magnesium sulfate fully dissolved.
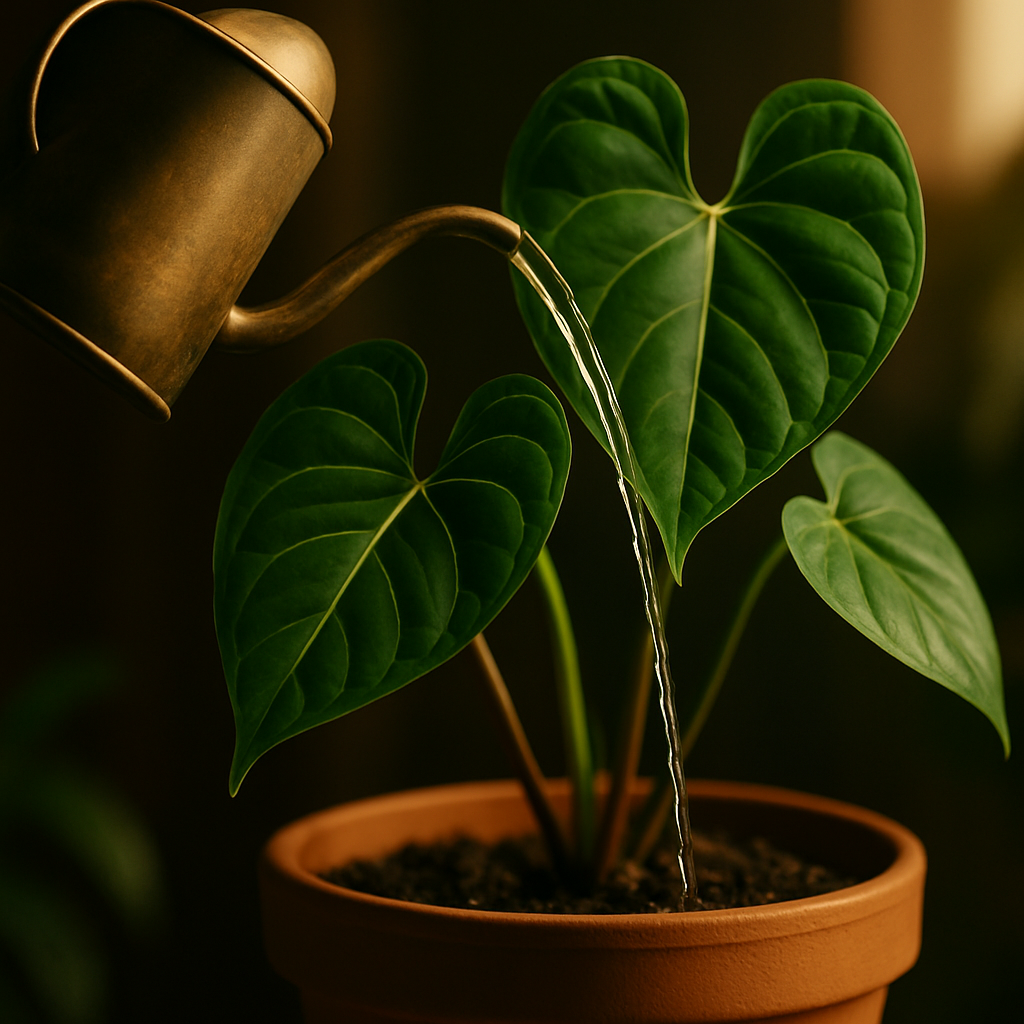
- Pour the solution slowly around the soil surface, keeping the stream away from the leaves. Wet leaves can develop mineral burns, and you’ll lose the benefit of root uptake.
- Let the pot drain naturally. If water pools in the saucer, discard it after a few minutes – excess salts can build up over time.
Does that feel doable? Absolutely. It takes the time of a coffee break, and the result is a noticeable brightening of those veins within a week.
Applying a slow‑release amendment
When you repot or top‑dress, sprinkle 2–3 lb of kelp meal per 10 gal of mix. If you’re working with a 5‑gal pot, that’s roughly 0.9 lb (about 400 g). Mix it into the top 2–3 inches of soil – you don’t have to dig deep, just blend it where the roots are most active.
After you blend it in, water the pot as usual. The moisture activates the organic particles, letting magnesium leach slowly over weeks. It’s the botanical equivalent of a slow‑cooker meal – low‑and‑steady delivers consistent flavor.
Safety net: pH check and timing
Remember the pH sweet spot: 5.5–6.5. If you’re not sure where your mix sits, a quick dip of a pH strip into a soil‑water slurry will tell you. Above 7? Add a pinch of peat moss per gallon of mix, or a splash of diluted vinegar (1 ml per litre) – just enough to nudge the acidity without shocking the plant.
Timing matters, too. Apply magnesium after a regular watering, not when the soil is bone‑dry. The moisture acts like a carrier, moving the ions straight to the root hairs.
Real‑world example: Maya’s Monstera makeover
Maya noticed the classic yellow‑veined pattern on her 8‑year‑old Monstera. She started with a ½ tsp Epsom‑salt solution every week for two weeks. The leaves perked up, but the new growth still looked a shade too pale. She then added 2 lb of kelp meal when she repotted the plant in a fresh, well‑draining mix. Six weeks later the entire plant was a uniform, glossy green – no more “yellow‑vein” drama.
My neighbor Luis runs a boutique aroid collection. He hooks a commercial liquid magnesium blend into his automatic misting system, delivering a precise 0.5 ml per litre of mist every night. The result? Consistent leaf coloration across dozens of Philodendrons, and he never has to remember a weekly teaspoon measurement.
Quick checklist before you pour
- Measure the supplement accurately – a kitchen scale helps for Epsom‑salt.
- Check soil pH; adjust if needed.
- Apply at the soil surface, avoid wetting foliage.
- Water thoroughly afterward, let excess drain.
- Mark the calendar: re‑test magnesium ppm after 4 weeks.
And remember, consistency beats intensity. A modest monthly top‑up of Epsom‑salt combined with a slow‑release amendment keeps the soil reservoir from ever dipping into deficiency.
Want the science behind why magnesium works so fast? The Royal Horticultural Society explains the role of magnesium in chlorophyll production, and the University of Minnesota’s extension service breaks down the dosage guidelines for indoor plants. Both sources back up the numbers we use here.
Give it a try, track the change, and you’ll soon be bragging about your magnesium‑savvy plant care at the next houseplant meet‑up.
Step 5: Adjust watering and lighting for optimal magnesium uptake
Now that you’ve got the right magnesium source in the pot, the next game‑changer is how you water and light your aroids. Think of it like setting the stage for a performance – the right spotlight and a well‑timed cue let the nutrient drama unfold without a hitch.
Why watering rhythm matters
Magnesium travels to the roots dissolved in water, so a steady, predictable moisture level keeps the ions moving. If the soil swings between bone‑dry and soggy, the plant either can’t pull the magnesium in or the excess salts start to build up, leading to the same yellow‑veined symptoms you’re trying to erase.
Hard water is another hidden villain. Calcium and magnesium often compete; a water profile heavy in calcium can actually lock magnesium out of the root zone. That’s why many aroid enthusiasts recommend using filtered or rain water for the final watering pass. For a deeper dive into proper watering techniques for indoor plants, check out the Gardening Know How guide.
Step‑by‑step watering tweak
- Test your tap water’s hardness with a simple kit (often under $10). If the calcium‑carbonate reading is above 120 ppm, consider a pitcher filter.
- Water when the top inch of soil feels dry to the touch – not a day after you see the leaves curling, but the moment the surface starts to look light.
- Apply the magnesium solution (or your regular fertilized water) first, then top off with plain filtered water to the usual volume. This “double‑dip” method lets the magnesium soak in before the dilution phase.
- Let the pot drain completely; discard any water that sits in the saucer for more than a minute.
- Repeat every 10‑14 days during active growth, then stretch to three‑week intervals in winter.
Here’s a real‑world snapshot: Maya’s 8‑year‑old Monstera was still showing faint yellow veins after two weeks of weekly Epsom‑salt sprays. She switched to a weekly “magnesium‑first” watering using rain‑collected water, and within ten days the new leaves turned a deep jade. The change was subtle but unmistakable – a proof that timing the nutrient delivery can be as crucial as the dose itself.
Lighting: the silent partner
Light doesn’t feed magnesium directly, but it drives photosynthesis, the process that uses magnesium to build chlorophyll. When a plant is starved for light, it can’t convert the magnesium it does absorb into the green pigment we all love. In other words, even a perfect magnesium regimen looks lackluster under dim conditions.
Most aroids thrive in bright, indirect light – roughly 1,000–1,500 foot‑candles. Direct sun burns the leaves, while low light stalls growth and masks any nutrient correction. If your spot is a north‑facing windowsill, add a grow‑light set to 12‑hour cycles; if you’re already near a south‑facing window, just keep a sheer curtain to filter harsh rays. The Spruce breaks down the ideal light levels for aroids in a handy chart.
Practical lighting tweaks
- Measure the light with a cheap smartphone lux app; aim for 10,000–15,000 lux during the middle of the day.
- Rotate pots 90° every week so each side gets equal exposure.
- For low‑light apartments, a 3000 K LED panel placed 12‑18 inches above the canopy provides the right spectrum without overheating.
- Increase light intensity gradually – a sudden jump can cause leaf scorch, especially on magnesium‑replete plants.
Luis, who runs a boutique aroid shop, installed a programmable LED bar that mimics a tropical canopy: 8 hours of 5,000 lux, a 2‑hour “dawn” ramp, and a 2‑hour “dusk” fade. After a month, his Philodendrons not only lost the yellow veins but also produced larger, more robust leaf segments – a clear sign that the light‑magnesium partnership was finally in sync.
Quick checklist for magnesium‑friendly watering & lighting
- Use filtered or rain water if tap hardness >120 ppm.
- Water when the top 1‑inch of soil feels dry.
- Apply magnesium solution first, then finish with plain water.
- Maintain 10‑14 day watering intervals during growth, 3‑week in dormancy.
- Provide 1,000‑1,500 foot‑candles of indirect light; supplement with LED if needed.
- Rotate pots weekly and monitor leaf color after each adjustment.
By fine‑tuning both water quality and light levels, you give your aroids the perfect runway to showcase the magnesium you’ve fed them. The result? Vibrant, chlorophyll‑rich foliage that turns heads – and keeps the magnesium deficiency in houseplants firmly in the past.
Step 6: Ongoing care and prevention strategies
So you’ve gotten the magnesium in the soil and the light right—congrats! But the work isn’t over. Magnesium deficiency in houseplants can creep back if we don’t keep an eye on the little details that matter day‑to‑day.
Keep a simple monitoring routine
First, check the leaves once a week. Look for the classic yellow‑veined pattern, especially on older foliage. If you catch a hint of pale veins early, a quick ½ tsp of Epsom‑salt in a cup of water can stop the problem before it spreads.
Second, test soil pH every 4–6 weeks. A quick dip of a pH strip into a soil‑water slurry tells you if you’re still in the 5.5‑6.5 sweet spot. If it drifts above 7, a pinch of peat or a splash of diluted vinegar (1 ml per litre) nudges it back without shocking the roots.
Seasonal feeding schedule
During the active growth phase (spring through early fall), aim for a magnesium “top‑up” every 4–6 weeks. A ¼ tsp of Epsom‑salt dissolved in 250 ml of water works for most aroids.
When growth slows in winter, you can stretch that interval to 8–10 weeks. The key is consistency, not a massive dose. Think of it like a coffee habit: a steady cup each morning beats a double‑espresso binge.
Integrate preventive practices into your routine
- Use filtered or rain water for the final watering pass if your tap hardness exceeds 120 ppm. Hard water floods the soil with calcium, which competes with magnesium at the root surface.
- Rotate pots 90° every week. This simple habit ensures every side gets equal light, preventing a shadowed side from becoming a hidden nutrient‑starved zone.
- Set a reminder on your phone for “magnesium check.” A quick note that says “leaf check + pH” keeps the habit from slipping.
- Pair magnesium with a slow‑release kelp meal when you repot. Kelp supplies trace minerals that help the plant use magnesium more efficiently.
Does this feel like a lot? Not really. It’s just a handful of actions you can slip into the chores you already do—watering, rotating, and a brief glance at the leaves.
The Spruce notes that most aroids thrive in 1,000–1,500 foot‑candles of indirect light, so keeping the light level steady is part of the same habit loop.
Real‑world examples that stick
Take Maya’s Monstera again. After she instituted a weekly leaf check and a ¼ tsp Epsom‑salt top‑up, the yellow veins never returned, even when she moved the plant to a cooler bedroom. The consistency paid off.
And Luis, the aroid shop owner, added a small “magnesium cartridge” to his misting system. The cartridge releases 0.3 ml per litre of mist every night. He says the plants now look “permanently vibrant,” and he never worries about a deficiency again.
Expert tip: combine with a balanced feed
Magnesium works best when the plant isn’t starving for nitrogen or iron. A balanced, water‑soluble fertilizer (20‑20‑20) applied at half strength once a month keeps the overall nutrition profile even. Gardening Know How explains how a balanced diet supports magnesium uptake, and the advice aligns with what most professional growers follow.
Finally, remember that the environment matters. Keep humidity in the 50‑70 % range for most tropical aroids; dry air can stress roots and make magnesium less available. A simple pebble tray or a room humidifier does the trick.
Quick prevention checklist
- Weekly leaf inspection for yellow veins.
- pH test every 4–6 weeks; adjust if >6.5.
- Magnesium top‑up every 4–6 weeks (spring/fall) or 8–10 weeks (winter).
- Filtered/rain water if tap hardness >120 ppm.
- Rotate pots weekly; ensure 1,000–1,500 foot‑candles of indirect light.
- Use a balanced fertilizer at half strength monthly.
- Maintain 50–70 % humidity for tropical aroids.
Stick to these habits, and you’ll turn magnesium deficiency in houseplants from a recurring nightmare into a one‑time fix. Your aroids will stay glossy, your friends will notice, and you’ll finally feel confident that you’ve nailed the long‑term care plan.
Conclusion
We've walked through the whole puzzle of magnesium deficiency in houseplants – from spotting the tell‑tale yellow veins to dialing in the perfect watering routine.
So, what does that mean for your aroids? It means you now have a handful of habits that feel as natural as checking the mail.
Key takeaways
- Test soil pH regularly; stay in the 5.5‑6.5 sweet spot.
- Top‑up magnesium every 4‑6 weeks in growth, 8‑10 weeks in winter.
- Use filtered or rain water when hardness tops 120 ppm.
- Keep humidity at 50‑70 % and give 1,000‑1,500 foot‑candles of indirect light.
- Pair magnesium with a balanced, half‑strength fertilizer for a well‑rounded diet.
Notice how each bullet is something you can slot into your existing care routine – no extra drama, just a little extra love.
Feeling confident? Good. Grab a spare Epsom‑salt jar, set a phone reminder, and watch your Monstera or Philodendron transform from “meh” to “wow.”
If you’ve enjoyed this guide, why not share it with a fellow plant nerd? A thriving aroid community starts with one simple tip.
Remember, the best care plan isn’t a checklist you file away; it’s a habit you live with. Keep observing, keep adjusting, and your plants will thank you with glossy, vibrant growth.
FAQ
What are the first signs of magnesium deficiency in houseplants?
Usually you’ll notice the older leaves turning a pale yellow, but the veins stay green – that’s the classic “yellow‑veined” look. It often starts on the lower foliage, where the plant can’t pull enough magnesium up the stem. You might also see a slight curling or a slower overall growth rate. If you catch it early, a quick Epsom‑salt top‑up can turn things around before the whole plant looks washed out.
How often should I feed magnesium to my aroids?
During the active growing months (spring through early fall) a small dose every 4–6 weeks does the trick. I like to dissolve a quarter teaspoon of Epsom‑salt in a cup of water and water it in after the regular feed. In winter, when growth slows, stretch that to about 8–10 weeks. Consistency beats a big one‑off dose – think of it like a steady cup of coffee rather than a double shot.
Can tap water cause magnesium deficiency in houseplants?
Yes, especially if your tap water is hard (above 120 ppm calcium). Hard water floods the soil with calcium, which competes with magnesium at the root surface, making it harder for the plant to absorb what it needs. If you notice a pattern of yellow veins after watering, try switching to filtered or rain water for the final watering pass. It’s a cheap switch that can save you a lot of leaf drama.
Is it safe to use Epsom‑salt on all houseplants?
For most tropical aroids, Philodendrons, Monsteras, and even ferns, Epsom‑salt is fine in the modest amounts we recommend. However, succulents and cacti prefer a drier, low‑mineral environment, so you’d want to skip the magnesium top‑up there. When in doubt, test a leaf or two first – a tiny spot of the solution won’t hurt, and you’ll see if the plant perks up or stays the same.
How do I know if my soil pH is affecting magnesium uptake?
Magnesium loves a slightly acidic medium, around pH 5.5‑6.5. If the soil drifts above 7, the magnesium can get locked out. A quick pH strip dipped into a soil‑water slurry tells you where you stand. If it’s too high, a pinch of peat moss or a splash of diluted vinegar (1 ml per litre of water) nudges the pH back without shocking the roots.
What’s the difference between a magnesium deficiency and iron deficiency?
Both can give yellowing, but iron deficiency usually shows up on the newest growth, while magnesium shows up on older leaves first. Iron‑deficient leaves turn uniformly yellow, losing the green veins, whereas magnesium‑deficient leaves keep those veins green, creating that “yellow‑veined” pattern we love to spot. Knowing the pattern helps you choose the right fix – magnesium for the veins, iron for the overall yellow.
Can I combine magnesium with my regular fertilizer?
Absolutely. In fact, a balanced, half‑strength fertilizer (like a 20‑20‑20) applied monthly gives the plant nitrogen, phosphorus, and potassium, while the magnesium top‑up fills the missing piece. Just apply the magnesium solution first, let it soak in, then give the regular feed. This order prevents the magnesium from being washed away and lets the roots absorb both nutrients efficiently.