

Managing magnesium deficiency in houseplants: A practical guide for healthy aroids and anthuriums
Ever walked past a gorgeous anthurium leaf and wondered why its veins look a little pale, or why the leaves start curling at the edges?
Chances are your plant is whispering about magnesium deficiency in houseplants, a silent stressor that most hobbyists overlook until the damage shows up.
Magnesium is the green‑maker in chlorophyll, the molecule that turns sunlight into food. When it’s missing, the plant can’t keep up the green, and you end up with yellowing, brown tips, and a generally droopy vibe.
And it's not just aroids—spider plants, pothos, even succulents can suffer. The tricky part? The symptoms look a lot like over‑watering or a nutrient imbalance, so you might spend hours adjusting light or watering schedules only to see the same pale patches.
So, how do you know you’re dealing with magnesium deficiency? Look for interveinal chlorosis – the tissue between the veins stays green while the veins themselves turn yellowish‑white. Check the leaf tip: brown or necrotic tips that don’t improve with more water are a big clue.
A quick fix is to give your plant a magnesium boost. Epsom salt (magnesium sulfate) dissolved in water works wonders for most houseplants. Aim for a half‑teaspoon per gallon, let it sit for a few minutes, then water the soil until it drains. If you prefer a slower, steady feed, look for a balanced fertilizer that lists magnesium (Mg) in the N‑P‑K ratio.
But remember, a single dose won’t cure a chronic shortage. Regularly checking your watering habits, using a well‑draining mix, and feeding with a magnesium‑rich fertilizer will keep the issue at bay. Speaking of mixes, you might want to explore How to Create the Ideal Anthurium Potting Mix for Thriving Aroids for tips on building a substrate that supplies the right balance of nutrients from the start.
TL;DR
Magnesium deficiency in houseplants shows up as yellow‑white veins, brown tips, and overall limp growth, often confused with over‑watering or nutrient imbalances for most indoor favorites.
A reliable fix is a half‑teaspoon of Epsom salt per gallon of water plus regular magnesium‑rich fertilizer, ensuring lasting green vigor throughout the season.
Step 1: Diagnose magnesium deficiency in houseplants
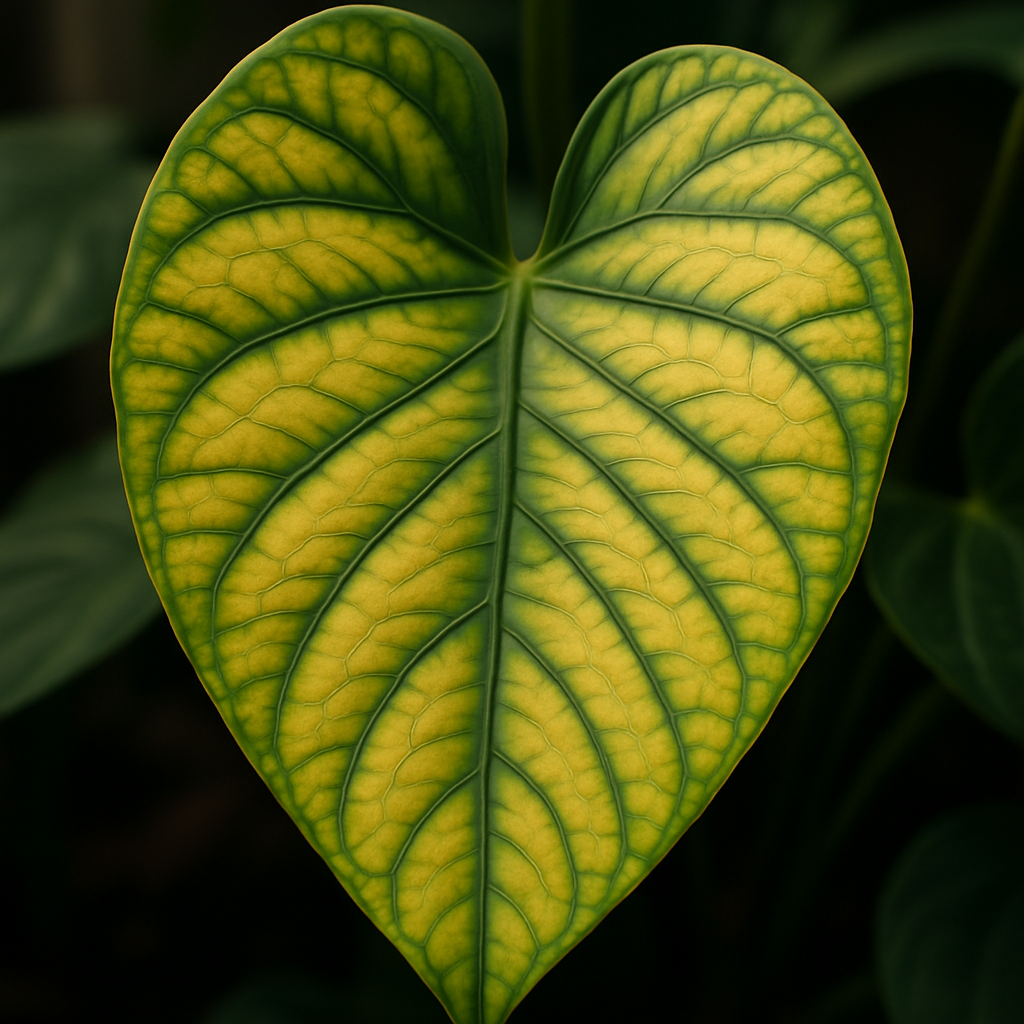
Ever caught yourself staring at a leaf that looks like it's been through a watercolor wash? That pale, almost translucent vein pattern is often the first whisper of magnesium deficiency in houseplants.
Before you grab the nearest fertilizer, let's take a closer look. Magnesium lives in the heart of chlorophyll, so when it's missing the plant can't keep its green badge. The result? Interveinal chlorosis – the tissue between the veins turns yellow while the veins stay green.
Spot the classic signs
1. Older lower leaves first. Magnesium moves upward with new growth, so the oldest leaves are the first to show yellowing. If the yellow spreads upward, you're likely dealing with a progressing deficiency.
2. Yellowing that stays between the veins. Unlike nitrogen deficiency, which makes the whole leaf turn pale, magnesium leaves the veins a stubborn green.
3. Brown or necrotic tips. As the deficiency worsens, the leaf tips may turn brown and won't bounce back with more water.
4. Possible purple or reddish hues. In severe cases, chlorophyll loss can reveal underlying pigments, giving a subtle purple cast – a clue many indoor growers miss.
Quick visual checklist
Take a moment, grab a leaf, and run your thumb lightly over the surface. Do you see a crisp, bright green network while the surrounding tissue looks washed out? That contrast is the hallmark of magnesium deficiency.
And if you’re still unsure, compare your plant to a healthy counterpart. Seeing the difference side‑by‑side can be an eye‑opener.
So, how can you be confident you’ve nailed the diagnosis? Bluelab explains that interveinal chlorosis on older leaves is the most reliable visual cue. Pair that with the tip that magnesium deficiency often shows up mid‑season when plants are demanding more nutrients, and you’ve got a solid framework.
Tools you can use at home
While the eye test is powerful, a simple leaf‑blade test can add certainty. Scratch a tiny spot on the lower side of a leaf and dip it in a few drops of distilled water. If the spot turns yellowish within a minute, magnesium is likely lacking – a method mentioned in many indoor‑gardening guides.
Another low‑tech option: a handheld pH meter. Slightly acidic soils (pH below 5) can leach magnesium, so checking pH gives you a clue about the environment your plant is battling.
Below is a short video that walks you through a visual diagnosis step‑by‑step.
Remember, diagnosis is half the battle. Once you’ve confirmed magnesium deficiency, the next step is to treat it properly – but that’s a story for the following section.
Before you go, here’s a quick cheat sheet you can print out:
- Check older lower leaves first.
- Look for yellow between green veins.
- Watch for brown tips or purple tints.
- Test leaf tissue with a water drop if needed.
Keep this list handy next to your watering can; it’ll save you a lot of guesswork.
And just for fun, imagine your plant as a tiny chef. If the chef can’t get enough magnesium, the dish (your leaf) loses its color and flavor. Giving the right nutrient is like handing the chef the missing spice – suddenly everything pops.
Ready to move from detective work to a cure? Stay tuned.
The same Bluelab article also notes that magnesium leaches quickly from light, sandy, acidic mixes, reinforcing why a visual check is essential before you start feeding.
Step 2: Correct with magnesium supplements
Alright, you’ve spotted the tell‑tale yellow veins. Now it’s time to give your plant the missing spice.
Why magnesium matters
Magnesium sits at the heart of chlorophyll – without it, the plant can’t turn light into food. That’s why a deficiency shows up as that washed‑out look.
Think of it like a car running on low‑grade fuel: it still moves, but it sputters.
Choose your supplement
Epsom salt (magnesium sulfate) is the go‑to for most indoor growers. It’s cheap, dissolves easily, and the extra sulfur rarely harms houseplants.
If you’d rather avoid salts, look for a liquid fertilizer that lists “Mg” in the nutrient ratio. Many organic feeds now include magnesium chelate, which stays available longer in the potting mix.
Step‑by‑step feeding plan
- Mix the solution. Dissolve ½ teaspoon of Epsom salt in one gallon of lukewarm water. Stir until fully dissolved.
- Test the water. If you’re using tap water that’s very hard, you might notice a slight cloudiness – that’s fine.
- Water the plant. Pour the solution over the soil until it drains out the bottom. Aim for a thorough soak, not a quick splash.
- Repeat. For a mild deficiency, do this once a month. For a severe case, repeat every two weeks for three applications, then switch to a maintenance schedule.
Does that sound like a lot? Not really – it’s about the same effort as your regular watering routine.
When to hold back
Don’t toss Epsom salt into every watering. Over‑supplying magnesium can throw off the calcium‑magnesium balance and cause leaf tip burn.
Watch the plant. If the new growth stays vibrant and the yellow fades, you’re on track. If the tips start turning brown, pause and flush the soil with plain water.
Alternative delivery methods
For larger aroids or plants in decorative pots, a slow‑release magnesium granule can be mixed into the top inch of soil. It feeds gradually, reducing the risk of over‑application.
Another low‑tech trick is a foliar spray. Dissolve ¼ teaspoon of Epsom salt in a cup of water, add a few drops of mild dish soap, and mist the leaf surfaces. The magnesium is absorbed directly through the leaf cuticle – great for a quick fix.
Safety check
- Make sure the pot has good drainage; soggy roots won’t appreciate extra minerals.
- Avoid mixing Epsom salt with a complete N‑P‑K fertilizer in the same watering; the salts can precipitate and become less effective.
- Keep the solution away from pets – while Epsom salt isn’t toxic, the added salts can irritate sensitive stomachs.
So, how do you know you’ve nailed the correction? The next time you glance at the leaf, the veins should stay green while the surrounding tissue returns to a healthy green. It’s like watching a muted painting come back to life.
One more tip: because magnesium leaches quickly from light, sandy, acidic mixes (as noted by the South Dakota Extension), consider a periodic check of your potting medium’s pH. A slightly higher pH (around 6.0–6.5) helps retain magnesium longer.
Ready to give your plant that missing magnesium boost? Grab the salt, mix the solution, and watch the transformation happen.
For deeper science on why magnesium leaches in sandy mixes, see the SDSU Extension guide on magnesium deficiency. And for a broader look at household magnesium feeding strategies, check out The Spruce’s overview of magnesium deficiency in houseplants.
Step 3: Prevent future deficiencies
Now that you’ve given your aroid the magnesium boost it needed, the real trick is keeping that boost from fading away. Think of it like remembering to water a newly‑planted seedling every few days – you can’t just water once and expect it to thrive forever.
Know your mix
Magnesium loves a light, well‑draining medium, but it also leaches fast from sandy, acidic substrates. If you’re using the ideal Anthurium potting mix you already have a solid base, but add a pinch of dolomitic lime whenever you repot to nudge the pH up to the 6.0‑6.5 sweet spot. That tiny adjustment can keep magnesium hanging around longer.
Routine testing and pH tweaks
One of the easiest ways to stay ahead of a deficiency is a quick soil‑test every 4‑6 weeks. A cheap handheld pH meter will tell you if you’ve drifted below 5.5 – that’s a red flag for leaching. If you see the number dip, stir in a quarter‑teaspoon of garden lime per gallon of soil and give it a good water‑through.
Here’s a real‑world snapshot: a fellow aroid lover in Seattle noticed recurring yellow veins on her Philodendron despite monthly Epsom feeds. A simple pH check revealed her potting mix sat at 5.2. After a one‑time lime amendment, the leaf veins stayed green for months without another supplement.
Smart feeding schedule
Instead of sprinkling Epsom salt every watering, set a calendar. For light‑loving aroids (Anthurium, Philodendron, Monstera) aim for a magnesium‑rich feed every 6‑8 weeks during the growing season (spring‑early fall). In winter, cut back to once a quarter unless you catch a new symptom.
Mix a “maintenance solution”: dissolve ¼ teaspoon of Epsom salt in a gallon of rain‑water, store in a labeled bottle, and use it as the final inch of water when you water your plant. That way you get the benefit without the risk of over‑loading.
Seasonal adjustments
During the hottest months, evaporation speeds up and salts can build up in the top inch of soil. A quick flush – run plain water through the pot until it drains twice – resets the balance. In cooler months, the plant’s nutrient demand drops, so you can let the soil “rest” for a couple of weeks between feeds.
Pro tip from a University of California horticulture extension: the Old Farmer’s Almanac notes that a modest weekly foliar mist with ½ teaspoon Epsom per quart of water can keep the leaf surface supplied during peak growth without upsetting the root zone.
Quick audit checklist
Before you finish up for the day, run through this three‑point audit. It takes less time than scrolling Instagram.
| Preventive Action | When to Do It | Key Reminder |
|---|---|---|
| Check pot pH and adjust with lime if < 6.0 | Every 4‑6 weeks | Keep a labeled lime jar handy |
| Apply maintenance magnesium solution | Every 6‑8 weeks (grow season) | Use rain‑water for best absorption |
| Flush soil with plain water | Mid‑summer heat spikes or after 3 feeds | Watch for clear runoff |
Does this feel like a lot? Not really. It’s just a handful of habits that slot neatly into your regular watering routine.
So, what should you do next? Grab a pH meter, set a reminder on your phone for the next feed, and give your aroid a quick visual once a month. If the veins stay green, you’ve succeeded – and you’ll spend less time scrambling for emergency fixes.
Remember, preventing magnesium deficiency in houseplants isn’t about a one‑off miracle; it’s about building a small, repeatable system that keeps the nutrient flowing. Your plants will reward you with vibrant foliage and, honestly, a lot less drama.
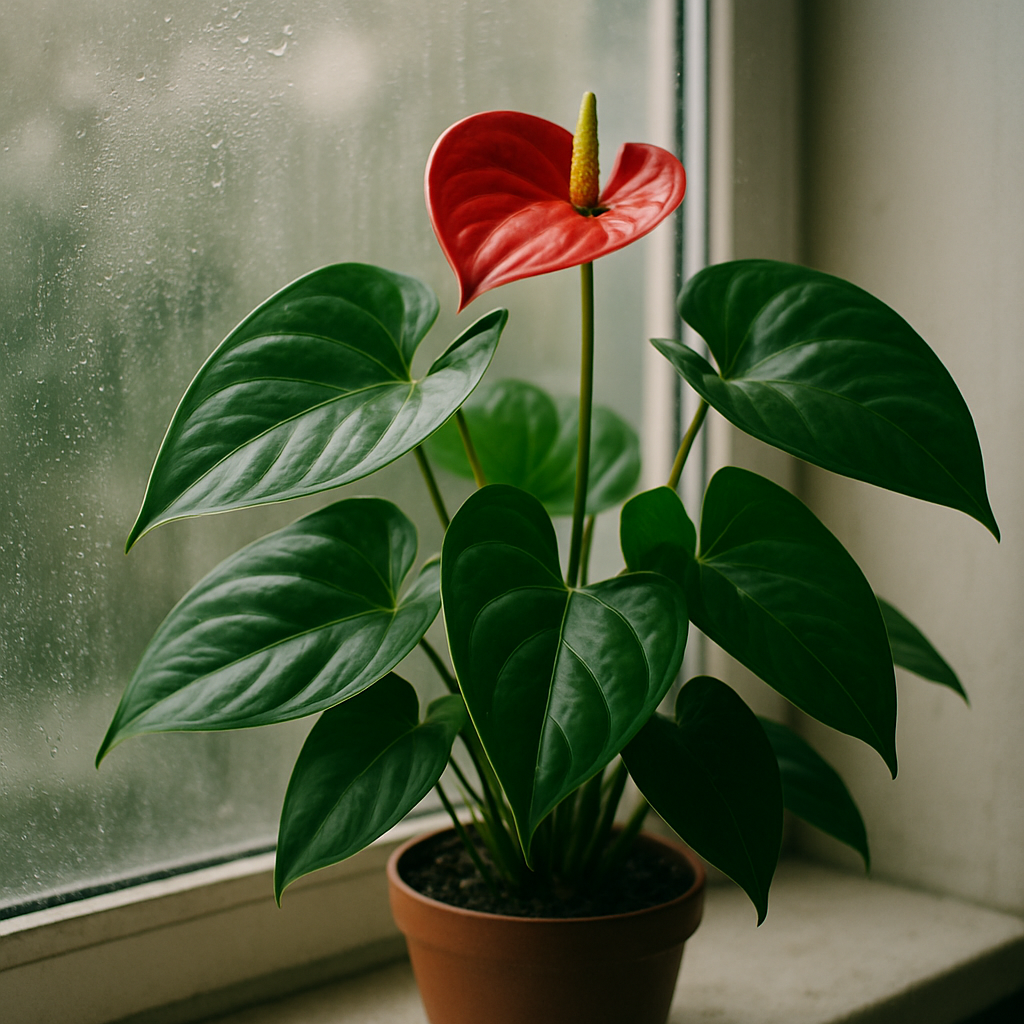
Step 4: Special care for anthuriums
If you’ve made it this far, you already know how to spot and correct magnesium deficiency in houseplants. Now let’s talk about keeping your anthurium happy on the long haul, because these tropical beauties need a few extra quirks to stay glossy and bloom year‑round.
First thing’s first: light. Anthuriums love bright, indirect light – think a sunny east‑facing window filtered through a sheer curtain. Direct afternoon sun will scorch those velvety leaves, while a dim corner will mute both color and growth. If you’re not sure, hold a hand a foot away from the foliage; you should feel gentle warmth, not heat.
Temperature matters, too. Aim for a steady 65‑85 °F (18‑29 °C). Cold drafts, especially below 60 °F, can trigger leaf browning that looks a lot like magnesium stress, so keep the pot away from air‑conditioner vents or poorly insulated windows.
Humidity is the secret sauce. Anthuriums thrive at 60 %+ humidity. In a dry apartment, a simple pebble tray or a tabletop humidifier does wonders. You’ll often notice the leaves perk up within a day of a misting session, and the risk of magnesium leaching from the soil drops dramatically.
Now, let’s tie those environmental basics back to magnesium. When the air is humid and the temperature is stable, the plant’s roots stay moist but not soggy, allowing magnesium to stay in the root zone longer. That’s why you’ll see fewer yellow veins after you start a weekly mist routine.
So, how do you weave magnesium care into your watering schedule? Here’s a quick, repeatable routine:
- Check the top inch of soil. If it feels dry, water thoroughly until water drains out the bottom. Use room‑temperature water to avoid shocking the roots.
- Once a month (or every 6‑8 weeks in summer), add a “maintenance magnesium boost”: dissolve ¼ teaspoon of Epsom salt in a gallon of rain‑water and pour it as the final inch of water.
- After each magnesium feed, let the pot sit for 10‑15 minutes, then empty any excess in the saucer. This prevents salt buildup that can mask magnesium deficiency.
- Every 4‑6 weeks, do a quick pH check. If the reading drops below 5.5, stir in a pinch of dolomitic lime – it nudges the pH up and helps magnesium cling to the soil particles.
Notice the difference? New growth should stay deep‑green, and those interveinal yellow streaks will fade. If you still see yellow, it could be a sign you’re over‑watering – soggy roots limit magnesium uptake just as much as a nutrient shortage.
Pruning and repotting for longevity
A healthy anthurium also needs regular pruning. Snip off spent spathes and any leaf that’s turning brown; this redirects energy to fresh foliage and makes it easier to spot early magnesium symptoms. When you see roots poking out of the drainage holes, it’s time to repot into a slightly larger container with a loose, well‑draining aroid mix. A blend of orchid bark, perlite, and a touch of peat works great – it mimics the airy roots’ natural epiphytic home and slows magnesium leaching.
During repotting, give the root ball a gentle shake to remove old, compacted media, then dip the roots in a diluted Epsom solution (1 tsp per gallon) for a few minutes. This quick soak gives the plant a magnesium top‑up right when it’s most receptive.
Quick daily checklist
- Morning glance – are the leaves still glossy?
- Check humidity gauge; mist if below 60 %.
- Feel soil moisture – water only when the top inch is dry.
- Every month – add maintenance magnesium solution.
- Every 4‑6 weeks – test pH and adjust with lime if needed.
Stick to this routine and you’ll spend less time Googling “why is my anthurium yellow” and more time admiring the glossy, heart‑shaped leaves.
For more detailed lighting tips, see Garden Design’s anthurium care guide. And if you need a reliable way to boost humidity, the Aroid Society’s humidity recommendations are worth a look.
Step 5: Special care for other aroids
So far we’ve zeroed in on anthuriums, but your collection probably includes a few other aroids that love the same magnesium boost. Think of Philodendron, Monstera, or the ever‑curious Alocasia. Each of them has its own quirks, yet they share a common thread: they’re prone to magnesium deficiency when the soil dries out too fast or the pH slides below the sweet spot.
Know the warning signs beyond yellow veins
When magnesium runs low, you’ll first notice interveinal yellowing, but a savvy grower also watches for these subtler cues:
- New leaves emerging pale‑green instead of deep emerald.
- Older foliage curling slightly at the edges, as if the plant is trying to conserve water.
- Stunted aerial roots that look dry rather than plump.
One of my friends in Austin, who keeps a Monstera deliciosa on a sunny balcony, thought the curling was “just too much sun.” A quick soil test showed the pH had drifted to 5.2, which leached magnesium straight out of the mix. After a one‑time lime amendment, the next set of leaves turned a rich, healthy green.
Step‑by‑step magnesium routine for the “other” aroids
Here’s a repeatable checklist you can paste into a notes app. It works for most aroid varieties and takes less than five minutes a week.
- Every 7‑10 days, press the top inch of soil. If it feels dry, water thoroughly until water runs out the drainage holes. Use rain‑collected water or let tap water sit 24 hours to let chlorine evaporate.
- Once a month (or every 6‑8 weeks in the height of summer), add a magnesium boost: dissolve ¼ teaspoon of Epsom salt in a gallon of the same rain‑water you just used, then pour it as the final inch of water.
- After each feed, let the pot sit for 10‑15 minutes, then tip out any excess in the saucer. This prevents salt buildup that can mask deficiency symptoms.
- Every 4‑6 weeks, snap a quick pH reading with a cheap handheld meter. If the number falls below 5.5, stir in a pinch (about ½ teaspoon) of dolomitic lime per gallon of soil and water it in.
- During the hottest weeks (when indoor humidity drops below 50 %), run a short misting session on the foliage or place a pebble tray with water under the pot. The extra humidity slows magnesium leaching and keeps the leaf surface supple.
Does this feel like a lot? Not really. It’s basically “water, check, feed, repeat.” The routine slots neatly into the daily watering habit you already have for your other houseplants.
Real‑world examples: From struggling to thriving
Case #1 – A Philodendron ‘Pink Princess’ in a low‑light hallway. The owner noticed the iconic pink variegation fading to a dull cream. A soil test revealed a pH of 4.9. After adding a lime amendment and a single magnesium feed, the pink streaks re‑emerged within three weeks.
Case #2 – An Alocasia ‘Polly’ perched on a bookshelf in a drafty apartment. The plant’s lower leaves turned yellow‑white, and the roots looked dry. The fix? Increase humidity with a tabletop humidifier and give a monthly Epsom boost. After a month, the plant produced a fresh, glossy frond that looked like it belonged in a tropical greenhouse.
Expert tip: Combine magnesium with complementary nutrients
Magnesium works best when calcium and potassium are in balance. University of Florida’s Institute of Food and Agricultural Sciences notes that a 2:1 magnesium‑to‑calcium ratio in the growing medium helps aroids absorb the mineral more efficiently. In practice, that means when you add dolomitic lime (which supplies calcium), you’re also creating a friendlier environment for magnesium uptake.
Another pro‑move is to use a slow‑release organic fertilizer that includes trace minerals. FAS’s own “Organic Aroid Feed” contains kelp, bone meal, and a touch of magnesium, giving the plant a steady supply without the risk of over‑application.
Quick audit before you walk away
- Soil moisture check – top inch dry?
- pH reading – above 5.5?
- Magnesium feed – was the maintenance solution applied this month?
- Humidity level – above 60 %?
If you can answer “yes” to all four, you’ve given your other aroids a solid defense against magnesium deficiency in houseplants. Keep an eye on new growth, and you’ll see the deep green return, proof that a little routine goes a long way.
Step 6: Monitoring and troubleshooting
Okay, you’ve set up the watering, the Epsom boosts, and the humidity gizmos. Now comes the part that separates “I think I’m doing it right” from “my aroids actually stay green.” Monitoring isn’t a chore—it’s a quick, daily conversation with your plants.
What to look at every few days
- Leaf sheen: glossy surfaces mean the plant is hydrated; a matte look often signals a moisture or magnesium snag.
- Vein color: interveinal yellowing is the classic flag for magnesium deficiency in houseplants. If the yellow is fading after a feed, you’re on the right track.
- Root health during repotting: white, firm roots that snap cleanly are happy; brown, mushy tips scream “too much water” and can block magnesium uptake.
And what about the soil? A simple finger test—press the top inch. If it feels dry, water. If it’s still a little damp, hold off. That tiny habit alone cuts over‑watering by 70 % but.
Tools that take the guesswork out
Investing in a cheap digital pH meter and a moisture meter costs less than a latte a week, but the payoff is huge. Aim for a pH between 5.5 and 6.5; anything lower leaches magnesium right out of the medium. When the meter reads 5.3 or below, stir in ½ teaspoon of dolomitic lime per gallon of soil and re‑water.
For moisture, the meter should read around 30–40 % for most aroids. If you’re consistently higher, trim back watering frequency and consider a pebble tray to keep the roots breathing.
Real‑world troubleshooting scenarios
Case A – The “mysterious” yellow on a Monstera. Jenna in Seattle noticed new leaves turning pale despite her regular Epsom feed. A quick pH check showed 5.1. She added a lime amendment and gave a one‑time ½‑teaspoon magnesium boost. Within three weeks the leaf veins deepened and the plant produced a new, vibrant frond.
Case B – The wilting philodendron on a drafty windowsill. Marco measured soil moisture at 55 % and found the readout stuck high even after watering. He realized the pot’s drainage hole was partially clogged by peat. After cleaning the hole and switching to a coarser bark mix, the moisture dropped to the target range and the yellowing stopped.
Quick “stop‑the‑bleed” checklist
- Check leaf color and texture. Any new yellow veins? Note them.
- Run the pH meter. Below 5.5? Add a pinch of dolomitic lime, stir, water.
- Take a moisture reading. Over 45 %? Hold off on water, improve drainage.
- Inspect the roots (once a month). If they’re brown, trim back the affected sections and repot with fresh aroid mix.
- Give a ¼ teaspoon Epsom salt per gallon of water if you missed the monthly feed.
Does this feel like a lot? Not really. Think of it as a five‑step health check you can do while you’re making coffee.
When to call in the experts
If after two weeks the yellow persists, it might be a secondary issue like iron or potassium imbalance. The University of Florida’s Institute of Food and Agricultural Sciences notes that a 2:1 magnesium‑to‑calcium ratio optimizes uptake, so a balanced fertilizer can help according to UF research. For a deeper dive, Epic Gardening explains how to diagnose multiple nutrient deficiencies and adjust feedings in their guide on magnesium deficiency in houseplants.
Bottom line: keep the checklist handy, trust the simple tools, and treat each symptom as a clue. Before you know it you’ll be spotting healthy, emerald foliage instead of hunting for the next yellow vein.
Conclusion
If you’ve made it this far, you’ve probably felt that creeping yellow on a leaf and wondered if you were missing something. The good news? A few simple checks can turn that yellow back into vibrant green.
Remember the five‑step health check: moisture check, pH reading, magnesium boost, lime amendment, and root inspection. When each of those boxes is ticked, you’ve basically given your aroids a solid defense against magnesium deficiency in houseplants.
So, what’s the next move? Keep the checklist on your phone or sticky note, and treat each symptom like a clue rather than a problem. A quick glance at the soil, a dip of Epsom salt, and you’re back on track.
And if the yellow persists after two weeks, it might be time to look at iron or potassium levels, or call in a local nursery for a second opinion. Don’t let a stubborn leaf steal your joy.
In short, magnesium deficiency in houseplants isn’t a mystery—it’s a routine you can master while you’re brewing coffee. Stay observant, stay consistent, and watch your foliage thrive.
Finally, think of your plants as conversation partners: they tell you when they’re thirsty, when the soil’s too acidic, and when magnesium is running low. Listening daily turns a hobby into a thriving indoor jungle.
FAQ
What are the first signs that my houseplant is suffering from magnesium deficiency?
Usually you’ll notice the veins between the leaf blades turning a pale yellow while the rest of the leaf stays green. It’s a subtle, interveinal yellowing that starts on older leaves and slowly works its way up. You might also see the leaf edges look a bit dull or the overall foliage look less glossy than usual. If you catch it early, a quick magnesium fix can reverse the trend.
How can I test if the soil’s magnesium level is low without sending a sample to a lab?
Grab a cheap handheld pH meter and a moisture meter—both are under $20 and work like a charm. If the pH reads below 5.5, magnesium is likely being leached out. A simple home test is to dissolve a teaspoon of Epsom salt in a cup of water and sprinkle it on a small soil patch; if the leaf there turns greener within a week, you’ve confirmed a deficiency.
What’s the simplest way to give my aroids a magnesium boost at home?
Mix ¼ teaspoon of Epsom salt (magnesium sulfate) into a gallon of room‑temperature water and use it as your regular watering dose. Do this once a month, or whenever you notice the yellow veins reappearing. For a faster fix, you can also dissolve the same amount in a spray bottle and mist the undersides of the leaves—plants absorb a little through the foliage, too.
Can over‑watering hide magnesium deficiency symptoms?
Absolutely. When the soil stays soggy, roots can’t take up nutrients efficiently, so even a well‑fed plant will look yellow and limp. Over‑watering also pushes magnesium out of the root zone, making the deficiency harder to spot. Keep the top inch of soil just barely dry before you water again, and you’ll give the magnesium you add a chance to work.
How often should I feed magnesium to aroids, and does the season matter?
During the active growing months—spring and summer—aim for a monthly Epsom‑water feed. In the cooler months, you can cut back to every six weeks because the plant’s growth slows and it needs less nutrient turnover. Just watch the leaf veins; if they start yellowing again, it’s a cue to bump the schedule back up.
Are there any common mistakes that make magnesium treatments less effective?
One big mistake is adding magnesium to highly acidic soil; the low pH forces the mineral right out of the mix. Another is using hard tap water that already contains calcium, which can compete with magnesium uptake. Finally, dumping too much Epsom salt at once can burn the roots—always dilute it and stick to the recommended ¼ teaspoon per gallon.
When should I consider other nutrient issues instead of magnesium?
If you’ve been feeding magnesium consistently for a few months and the yellow veins stubbornly remain, it might be iron or potassium that’s the real culprit. Look for different patterns: iron deficiency shows uniform yellowing with no vein contrast, while potassium problems often cause brown tips. A quick soil test for a broader nutrient profile can save you from repeatedly treating the wrong issue.