

Organic Fertilizer for Houseplants: A Practical Guide for Healthy Growth
Ever walked into your living room and caught a glimpse of a droopy leaf that used to be the star of your plant collection?
You know that sinking feeling when you wonder if you missed a simple step, like feeding your green friends the right way?
If you’ve ever asked yourself, “What’s the secret sauce for keeping houseplants thriving without a chemistry lab?” the answer is often right in the garden shed: organic fertilizer for houseplants.
It’s not a fancy buzzword, just a gentle, nutrient‑rich boost that works with the soil microbes you already love.
Think about the last time you tossed a synthetic pellet into a pot and watched the roots gasp for balance.
Now picture a handful of compost‑based feed, slow‑releasing nitrogen, phosphorus, and potassium, coaxing new growth like a friendly whisper.
And the best part? You don’t need a PhD in horticulture to get it right.
Most of us are just trying to keep an anthurium’s glossy heart happy, or an aroid’s sculptural leaves from turning brown at the edges.
So, why does organic matter matter more than a quick‑fix chemical mix?
Because it feeds the tiny fungi and bacteria that break down nutrients, creating a living buffet that your plant can tap into day after day.
You might be wondering if it’s safe for pets or if the scent will overwhelm your living room.
The truth is, most organic feeds are odorless, low‑risk, and break down naturally, leaving no lingering residues.
Here’s a little promise: by the end of this guide you’ll know exactly which organic fertilizer for houseplants to choose, how to apply it without over‑doing it, and a few DIY tricks to keep your indoor jungle thriving.
Let’s dive in, share a few stories from fellow aroid lovers, and get those leaves reaching for the light again.
TL;DR
Organic fertilizer for houseplants feeds soil microbes, delivering slow‑release nutrients that keep anthuriums, aroids, and other greens vibrant without chemical spikes.
Follow our simple guide to choose the right blend, apply it safely, and watch your indoor jungle thrive with lush, resilient foliage for years to come, effortlessly and joyfully.
Step 1: Choose the Right Organic Fertilizer for Your Houseplants
First thing's first – you need a feed that talks the same language as your soil microbes. Not every “organic fertilizer for houseplants” is created equal, and picking the wrong blend can feel like feeding your anthurium a sugar‑free candy.
Know your plant’s appetite
Think about the last time you watched an aroid stretch a fresh leaf after a light watering. That moment tells you the plant is thriving on a steady supply of nitrogen, phosphorus, and potassium that’s released slowly. Look at the foliage: if it’s a little pale or the new growth is slower than usual, you probably need a fertilizer with a higher nitrogen ratio.
On the flip side, if your anthurium’s spadix is turning brown at the tip, you might be over‑feeding or using a blend that’s too phosphorus‑heavy. A balanced N‑P‑K (like 2‑1‑2) works for most houseplants, while a bloom‑boosting 1‑2‑2 is better for flowering aroids.
Check the source material
Organic doesn’t automatically mean “all‑natural” for every plant. Some feeds are compost‑based, others are kelp or worm castings. Compost‑derived mixes tend to be richer in micronutrients and beneficial microbes, which is a win for a soil‑less potting medium.
When you’re scrolling through options, keep an eye on these red flags: synthetic additives listed in the ingredients, a high percentage of “organic matter” that’s actually wood chips (hard to break down), or a strong, unpleasant smell. A good organic fertilizer should be faint‑smelling or odorless and break down without leaving a residue.
Match the product to your growing conditions
If you keep your plants on a windowsill that gets a burst of sun in the morning, a fast‑acting liquid feed can be handy. But for low‑light corners, a slow‑release granule that leaches nutrients over weeks is kinder.
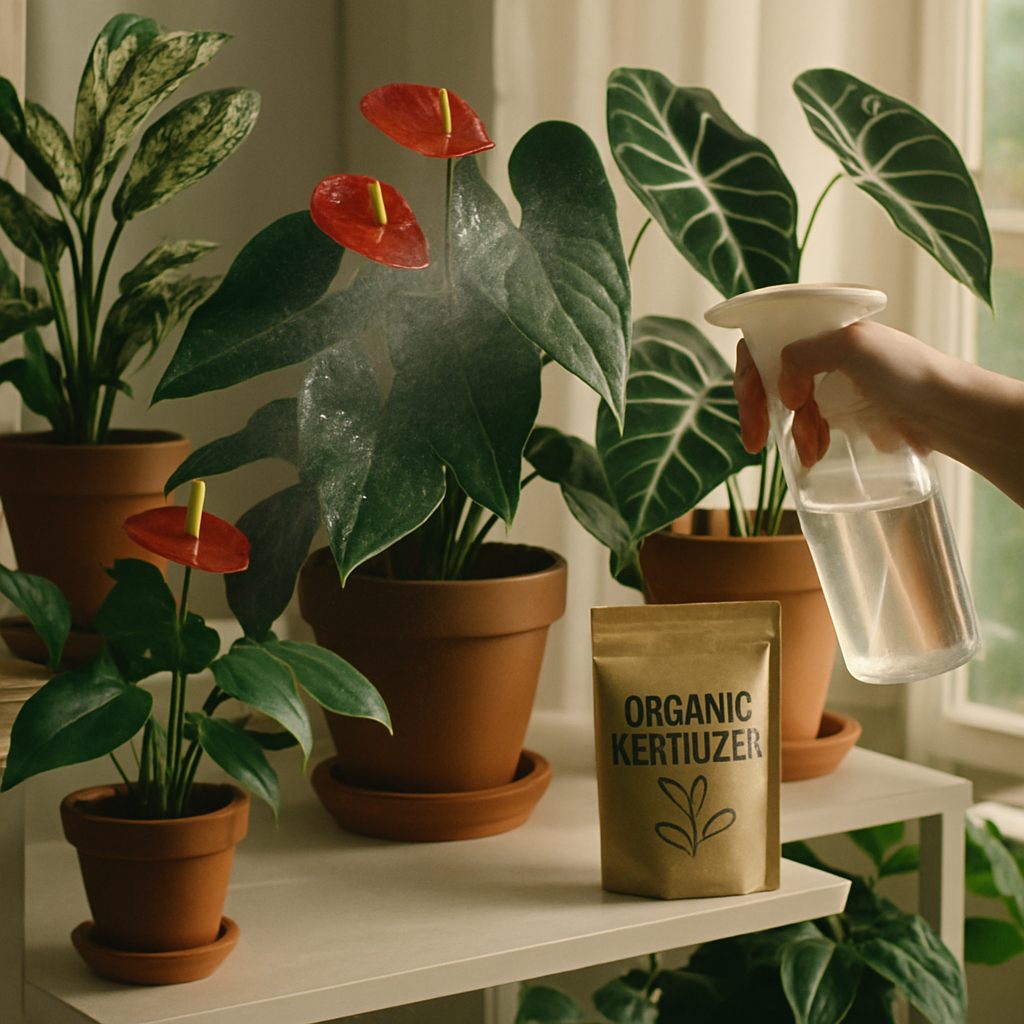
For those who love a hands‑off approach, I swear by the Organic Foliage Feed w/ pest prevention and Fertilizers – FAS. It combines a gentle nutrient mix with natural pest‑deterring compounds, so you get feed and protection in one scoop.
How to test before you commit
Grab a small pot of your usual potting mix, add a quarter‑strength dose of the chosen fertilizer, and water as normal. Wait a week and observe any changes in leaf colour or new growth. This mini‑experiment saves you from over‑loading a larger container.
Another tip: keep a simple log. Jot down the date, amount applied, and any visual changes. After a month you’ll see a pattern and can adjust the dosage accordingly.
Practical buying checklist
- Label lists N‑P‑K ratio – aim for 2‑1‑2 for foliage, 1‑2‑2 for bloomers.
- Ingredient list: compost, worm castings, kelp, bone meal – avoid synthetic salts.
- Form: liquid (easy to mix), granule (slow‑release), or powder (versatile).
- Additional benefits: pest deterrents, mycorrhizal fungi, or micronutrients.
- Packaging size that matches your pot count – you don’t want to end up with a half‑empty bag.
Frequency and dosage
Most organic blends work well when applied every 4–6 weeks during the growing season (spring through early fall). In winter, cut the schedule back to once a month or even pause if your plants are in dormancy. Remember, a little goes a long way – over‑application can lead to salt buildup and root burn.
If you notice white crust on the surface of the soil, that’s a sign you’ve fed too much. Flushing the pot with a gallon of water can rinse excess salts, but it also reminds you to dial back the next round.
Storing your fertilizer in a cool, dry place prolongs its life. Moisture can cause clumping, and heat can degrade the beneficial microbes. A sealed jar on a shelf away from direct sunlight does the trick.
Now, let’s bring it all together with a quick visual.
And if you still wonder how to actually apply the feed, check out the short video below. It walks through measuring, mixing, and the best times of day to feed.
Bottom line: the right organic fertilizer respects the rhythm of your plant’s root zone, supplies the macro‑ and micronutrients it craves, and does so without shocking the microbial community. Pick a blend that matches your plant’s growth stage, check the ingredient list, test it in a small pot, and keep a simple log. You’ll soon see those droopy leaves perk up like they’ve just had a conversation with a supportive friend.
Step 2: Prepare and Apply Organic Fertilizer Properly
Gather what you need
First, pull out a clean measuring spoon, a small bucket, and a watering can with a fine‑spout. Having everything at hand stops you from guessing mid‑mix and keeps the process smooth.
Grab the organic fertilizer for houseplants you chose in step 1 – whether it’s a granule, powder, or liquid.
Dial in the right strength
Organic feeds are potent, so you’ll usually start with a quarter‑strength solution. That means if the label says "use 1 tbsp per gallon," you’ll use only ¼ tbsp.
Mix the measured dose into lukewarm water, stir until it’s fully dissolved, and let it sit a minute so any tiny particles settle.
Yarafert points out that indoor plants thrive on low, steady doses and that over‑fertilizing can cause salt buildup that hurts delicate roots.
When to feed
Timing is everything. Aim for early morning or late afternoon when the plant’s transpiration is active but the sun isn’t scorching the leaves.
During the growing season (spring to early fall) feed every 4–6 weeks; in winter cut back to once a month or pause if the plant is dormant.
How to apply
Pour the diluted feed slowly onto the soil surface, aiming for the root zone. Avoid splashing the foliage – the leaves don’t need a nutrient shower.
If you’re using a granule, sprinkle a thin layer over the top, then water lightly to coax the granules to dissolve.
For a powder, dissolve it first – the same rule applies: water at the base, not the leaf blades.
Check your work
After watering, let excess liquid drain fully. If you see white crust on the soil after a few days, you’ve over‑fed – a quick flush with a gallon of water will rinse out the excess salts.
Keep an eye on the leaves: a subtle green boost means you’re on the right track; yellowing or browning tips signal it’s time to back off.
Log it
Write down the date, amount, and any visual changes. A simple notebook or phone note helps you spot patterns and avoid accidental over‑application.
Even a quick “fed ¼ tbsp on 10 May – new leaf emerging” entry can save you weeks of guesswork.
Pro tip for aroids and anthuriums
These tropical beauties love a steady, low‑dose feed because their roots are shallow and love moisture. A light mist of diluted organic fertilizer once a month can keep the foliage glossy without overwhelming the soil microbes.
And if you ever feel unsure, remember: a little feed now is better than a big dump later. Your plants will thank you with healthier growth and fewer stress signs.
Step 3: Tailor Fertilization for Anthuriums and Other Aroids
Alright, you’ve got the right organic fertilizer for houseplants in hand, you’ve mixed it at a gentle strength, and you’ve watered it in. Now comes the part where you actually speak the plant’s language – customizing the feed so your anthurium or any aroid feels right at home.
Know your aroid’s feeding rhythm
Most aroids, including anthuriums, love a steady, low‑dose supply. Their roots are shallow, and they thrive in a consistently moist medium. Think of it like a light snack every few weeks rather than a Thanksgiving feast.
Do you notice new leaf veins unfurling after a feed? That’s your cue that the rhythm is working. If the soil stays soggy for days, you’re probably over‑watering and over‑feeding at the same time.
Pick the right dose
Start with a quarter‑strength solution – that’s the sweet spot most growers swear by. For a liquid feed, mix ¼ tablespoon of fertilizer per gallon of water. If you’re using a slow‑release granule, sprinkle a thin layer about the size of a pea over the top and water it in.
Here’s a quick mental checklist: one pea‑sized scoop for a 6‑inch pot, half that for a 4‑inch pot. It’s easier than guessing and it prevents the dreaded white crust on the surface.
Timing is everything
Early morning or late afternoon are the golden windows. The plant is actively transpiring, so it can pull the nutrients into the root zone without the stress of midday heat.
During the growing season (spring through early fall) aim for every 4–6 weeks. In winter, cut back to once a month or pause entirely if the foliage looks like it’s taking a nap.
Does this timing feel rigid? Not at all – treat it as a guideline and adjust based on what you observe.
Watch the signs
After each feed, keep an eye on three tell‑tale signs. First, leaf color: a subtle, healthy green boost means you’re on track. Second, new growth: a fresh leaf or a tiny shoot at the base is a green thumbs‑up.
Third, the soil surface: if you see a chalky white film after a few days, you’ve over‑fed. A quick flush with a gallon of room‑temperature water will wash out excess salts.
And if the leaf tips start turning brown, that’s a sign you’ve either over‑fertilized or the humidity is too low – a quick mist can often solve both.
Adjust on the fly
Use a simple log – just jot the date, amount, and any visual change. Over a month you’ll see patterns: maybe your anthurium loves a feed every five weeks, while a nearby philodendron prefers six.
If you’re feeling unsure, remember the “less is more” mantra. A tiny mist of diluted feed once a month is usually enough to keep glossy foliage without upsetting the soil microbes.
And here’s a little secret: you can alternate between a nitrogen‑rich feed for foliage growth and a bloom‑boosting mix when the spadix is about to emerge. Switch the ratio only for that one feeding cycle, then go back to your regular low‑dose schedule.
Putting it all together
So, to recap: know the plant’s natural rhythm, start with a quarter‑strength dose, feed in the early morning or late afternoon, watch leaf color, new growth, and soil crust, and adjust based on a quick log. Follow these steps and your anthurium will stay vibrant, and your other aroids will thank you with more dramatic leaf splits and healthy aerial roots.
Ready to give your jungle a personalized feeding plan? Grab that organic fertilizer for houseplants, set a reminder on your phone, and watch your indoor forest flourish.
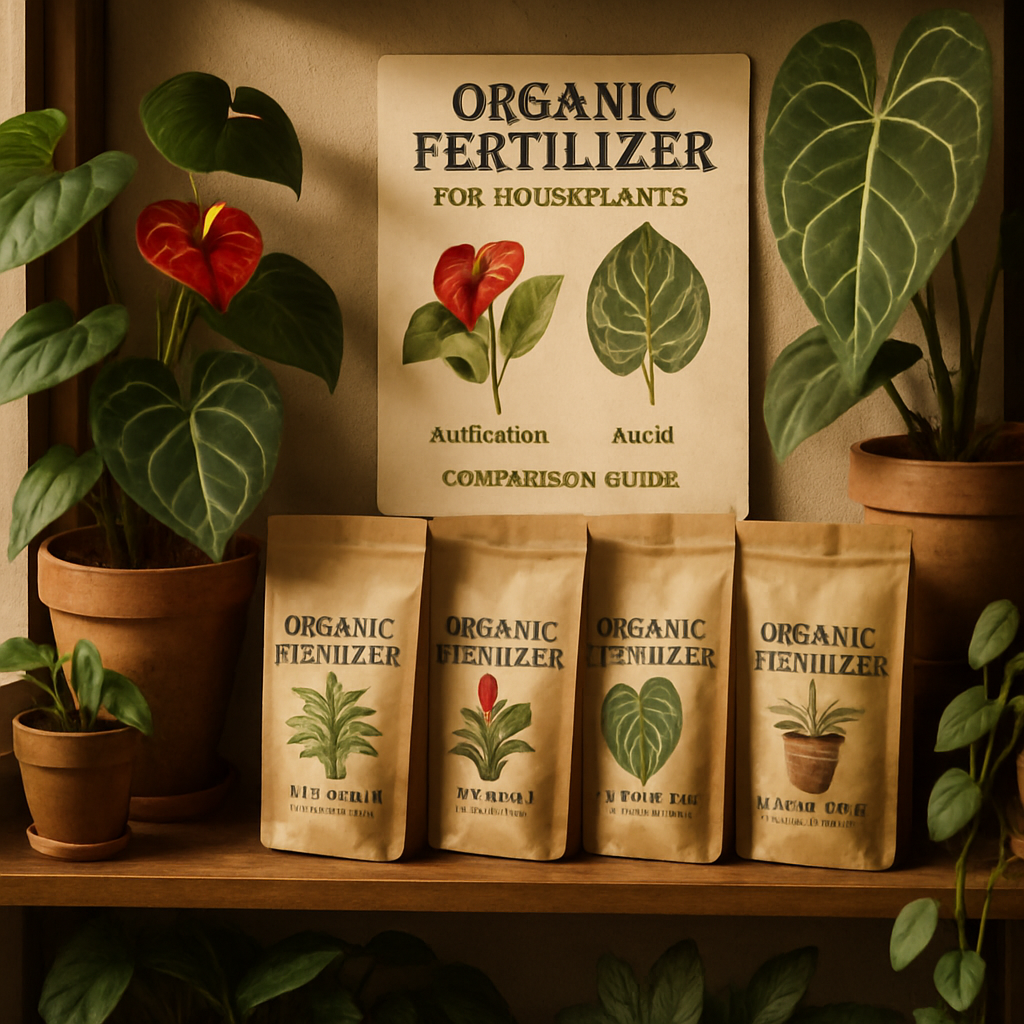
Step 4: Compare Popular Organic Fertilizer Options
Now that you’ve got the basics down, it’s time to look at the actual products you might line up on your shelf. Which organic fertilizer for houseplants will actually keep your anthuriums glossy without turning the soil into a salty swamp?
Below is a quick rundown of three fan‑favorites that keep showing up in hobbyist forums and in the hands of pros. I’ve boiled each down to what matters most: the nutrient source, how you apply it, and the kind of plants that seem happiest.
Espoma Organic Indoor Plant Food
This liquid concentrate packs hydrolyzed poultry manure, soy protein, fish protein, bone meal, and kelp extract. The blend also sneaks in beneficial microbes and humic acid, which help the plant soak up nutrients and keep the pH steady. According to Bob Vila’s review of Espoma Organic Indoor Plant Food, the formula is mild, odor‑free, and works well with a quarter‑strength dose twice a month.
Because it’s a liquid, you dissolve the measured dose in water and pour it at the soil surface. The downside? You have to mix each time, so it’s a bit more work than a sprinkle‑and‑water granule.
Neptune’s Harvest Organic Fertilizer
Neptune’s Harvest leans heavily on fresh fish and seaweed from the North Atlantic. It’s OMRI‑certified, so you know every ingredient is truly organic. Growers love the extra iron and trace minerals that come from the seaweed, which can give a subtle boost to new leaf veins.
The product is a concentrated liquid without a built‑in measuring cap, so you’ll need a kitchen spoon. It does have a stronger fishy smell when undiluted, but the scent fades quickly once mixed with water.
Dr. Earth Organic Fertilizer
Dr. Earth uses alfalfa meal, fish bone meal, fish meal, and kelp meal. The formula smells more like a hayfield than a fish market, which many indoor gardeners appreciate. It comes as a powder that you stir into water, then feed as you would any liquid feed.
One thing to note: the bag is larger and a bit bulky, so it’s best for folks with several pots or a dedicated storage shelf.
Quick Comparison Table
| Fertilizer | Key Ingredients | Ideal For |
|---|---|---|
| Espoma Organic Indoor Plant Food | Poultry manure, soy & fish protein, bone meal, kelp, microbes | General houseplants, especially foliage lovers |
| Neptune’s Harvest | Fresh fish, seaweed, kelp | Plants that need a micronutrient boost, blooming aroids |
| Dr. Earth Organic Fertilizer | Alfalfa meal, fish bone meal, kelp meal | Eco‑conscious growers, larger collections |
So, how do you pick? Think about your routine first. If you already measure out liquid feeds for other projects, Espoma’s easy‑mix formula fits right in.
If you love the idea of marine nutrients and don’t mind a quick stir, Neptune’s Harvest can give that extra sparkle to a blooming anthurium.
Do you have limited storage space? Dr. Earth’s powder can sit in a small container, but you’ll need a bit of room for the 4‑pound bag. The powder also lets you scale doses down to a pinch for tiny seedlings.
Another practical factor is cost per feed. Espoma’s 8‑ounce bottle is cheap per application, while Neptune’s Harvest often runs a bit higher because of the fish component. Dr. Earth sits in the middle, especially if you buy a bulk bag.
Lastly, watch the plant’s response. A healthy green boost after a few weeks means you’ve hit the sweet spot. If you see white crust on the soil, dial the dose back or switch to a slower‑release option.
Bottom line: there’s no one‑size‑fits‑all answer. The best organic fertilizer for houseplants is the one you can use consistently, that matches your plant’s growth stage, and that keeps the soil microbes smiling.
Step 5: Troubleshoot Common Fertilizer Issues
Spotting fertilizer burn before it hurts
We’ve all been there – a glossy new leaf, then a few days later the tips turn brown. That crisp, dry edge is the classic sign of fertilizer burn, especially with organic fertilizer for houseplants that’s been over‑diluted or applied too often.
According to the Spruce, brown leaf tips and margins are an early warning that excess salts are choking the roots and drying out the foliage (see signs of fertilizer burn). If you catch it early, you can often save the plant with a quick flush.
Flush, rinse, repeat
First thing – grab a clean sink or shower head and run cool, clear water through the pot until it drains freely. Think of it like a gentle shower for the roots; the water dissolves the salt buildup and carries it away.
Do this two times in a row: the first rinse loosens the salts, the second washes them out of the medium. Let the pot drain completely before you set it back on its saucer.
White crust? Time for a top‑soil swap
If you notice a chalky white film on the surface, that’s salt crystallizing after the water evaporates. Scrape off the top inch of mix and replace it with fresh, well‑draining potting media. This simple step prevents the salts from re‑entering the root zone.
When the crust spreads to the pot walls or even the leaves, it’s a cue to repot entirely. Fresh soil gives the microbes a clean slate and stops the burn from lingering.
When wilting means more than thirst
Wilting can be confusing because we usually blame watering. But with fertilizer burn, the roots are damaged and can’t absorb water, so the plant looks parched even though the soil is moist.
Give the plant a gentle water soak, then watch for any new growth over the next two weeks. If nothing sprouts, you may need to prune dead roots and repot with a light feed of half‑strength organic fertilizer.
Adjusting your feeding rhythm
Now that you’ve cleared the excess, it’s time to tweak the schedule. Most aroids thrive on a quarter‑strength feed every 4–6 weeks during the growing season. In winter, cut back to once a month or pause altogether.
Keep a tiny notebook: date, dose, and any visual changes. After a month you’ll see a pattern – maybe your anthurium loves a feed every five weeks, while your philodendron prefers six.
Quick troubleshooting checklist
- Brown tips or edges? Flush with cool water twice.
- White crust on soil or pot? Scrape top inch or repot.
- Wilting despite moist soil? Check for root damage, prune, and repot.
- Stunted growth after feeding? Dilute next feed to half strength.
- Recurring salt buildup? Switch to distilled or rain water for irrigation.
Remember, organic fertilizer for houseplants is forgiving, but it still obeys the law of salts. A little patience, a good flush, and a keen eye on the foliage will keep your jungle thriving.
Deep Dive: Understanding Nutrient Needs of Houseplants
Ever caught yourself wondering why that glossy philodendron suddenly looks a bit tired despite your diligent watering schedule?
Chances are the plant is whispering about its nutrient cravings, and that’s exactly what we’ll unpack in this deep dive.
Macronutrients: The big three you can’t ignore
Just like us, houseplants need a steady supply of nitrogen, phosphorus, and potassium – the classic N‑P‑K trio.
Nitrogen fuels leaf growth, so if you notice slower new shoots or pale foliage, think “nitrogen‑deficient.” A light, quarter‑strength feed of organic fertilizer for houseplants can revive that vibrant green.
Phosphorus is the root‑builder. When roots look stunted or the plant struggles to bounce back after repotting, a boost of organic bone meal or fish bone in your feed can make a difference.
Potassium helps with overall vigor and disease resistance. If you see edge‑burn or weak stems, a sprinkle of kelp‑derived potassium in your liquid feed might be the missing piece.
Micronutrients: The tiny helpers that matter
Iron, magnesium, zinc, and manganese are like the backstage crew – you don’t see them, but without them the show falls apart.
Iron deficiency shows up as yellowing between leaf veins, especially on younger leaves. Adding a dash of chelated iron or seaweed extract (both common in organic blends) often clears that up in a couple of weeks.
Magnesium shows up as a buttery yellow on the leaf edges, while zinc deficiency can cause small, distorted new leaves. A balanced organic blend that includes alfalfa or kelp meals usually covers these bases.
Balancing soil life: Why microbes are your plant’s best friends
Organic fertilizer isn’t just about supplying nutrients; it feeds the microbial community living in the potting mix.
Those microbes break down the organic matter into forms the roots can actually use. That’s why you’ll often see “humic acid” or “beneficial microbes” listed on premium blends.
When the soil feels compacted or you notice a white crust on the surface, it’s a sign the microbial balance might be off. A gentle flush with distilled water, followed by a light dose of organic fertilizer, helps restore that hidden ecosystem.
Reading your plant’s signals
Every plant has its own language. Here are three quick cues to watch:
- Leaf color: Dark green means nitrogen is happy; yellowing between veins hints at iron.
- Growth rhythm: New shoots every 4‑6 weeks usually signal a well‑fed plant; a long pause suggests it’s time to feed.
- Root health: When you gently ease a plant out of its pot, healthy roots should be white and firm. Brown, mushy tips often mean a salt buildup from over‑fertilizing.
So, what’s the actionable takeaway?
Start a simple feeding log: note the date, the dose (quarter‑strength is a safe baseline), and any visual changes you spot. After a month you’ll spot patterns – maybe your anthurium loves a feed every five weeks, while your snake plant is fine with eight.
Remember, organic fertilizer for houseplants works best when you treat it like a conversation: listen, adjust, and keep the dialogue friendly.
A quick trick? Mix a pinch of crushed eggshell into the topsoil every few weeks; it slowly releases calcium and keeps the pH steady, giving your foliage that bounce.
Conclusion
We've walked through the why, the what, and the how of using organic fertilizer for houseplants, and you’ve seen how a little micro‑nutrient love can turn a sleepy leaf into a vibrant showcase.
Remember the three signals: leaf color, growth rhythm, and root health. If any of those feel off, a quarter‑strength feed and a quick water flush usually set things right.
And don’t forget the habit that makes all this stick – a simple feeding log. Jot down the date, the dose, and what you notice. After a few weeks you'll spot patterns you never imagined, like that anthurium thriving on a five‑week cycle while your snake plant prefers a slower pace.
So, what’s the next step? Grab a bottle of organic foliage feed, mix a pinch of crushed eggshell for calcium, and give your pot a gentle rinse when you see salt crust. Treat each feed like a conversation, not a command.
Ready to let your indoor jungle speak louder? Dive back into your plant journal, tweak the schedule, and watch those leaves bounce back with confidence. Happy feeding!
Keep experimenting, trust your instincts, and remember that every feed is a step toward a thriving, greener home and joy.
FAQ
How often should I use organic fertilizer for houseplants?
Most aroids and leafy growers thrive on a quarter‑strength feed every 4–6 weeks during the active growing season. In winter, you can stretch that to once a month or even pause if the plant isn’t putting out new shoots. The key is to watch the leaf color and growth rhythm – if new leaves keep popping, you’re probably on the right schedule.
Can I use organic fertilizer on all types of houseplants, including succulents?
Yes, but you’ll want to adjust the strength. Succulents prefer a very light dose, like one‑tenth of the recommended amount, because they store water and can easily tip into salt‑burn. Ferns, philodendrons, and anthuriums love the richer blend, especially when the soil is well‑draining. Think of it as tailoring a conversation: the same topic, but a softer tone for the shy ones.
What’s the best way to dilute organic fertilizer for a safe feed?
Start with the label’s “quarter‑strength” recommendation, then add half that amount of water again. For example, mix 1 teaspoon of liquid feed into 1 quart of room‑temperature water, stir, and let it sit a few minutes. If you’re unsure, err on the side of weaker – you can always feed again in two weeks. A gentle pour into the soil surface lets the roots absorb nutrients without shocking them.
How do I know if my plant is getting too much fertilizer?
Brown leaf tips, a white crust on the soil surface, or wilting despite moist soil are classic warning signs. When you see those, give the pot a quick flush with cool water twice in a row to wash out excess salts. Keep a simple feeding log – date, dose, and any visual changes – so patterns emerge and you can dial back before damage sets in.
Is it okay to mix organic fertilizer with regular tap water?
It’s fine, but consider the water quality. Hard tap water already contains calcium and magnesium, which can add extra salts when combined with a fertilizer. If your water feels “hard” (you notice white residue on dishes), switch to filtered, rain, or distilled water for the feed. That small change keeps the nutrient balance gentle and predictable.
What are some DIY organic fertilizer ingredients I can make at home?
Crushed eggshells, a handful of kelp meal, and a splash of compost tea are all plant‑friendly boosters. Blend dried eggshells into a fine powder for slow‑release calcium, stir a teaspoon of kelp meal into your liquid feed for micronutrients, and brew a cup of compost tea by steeping well‑aged compost in water for 24 hours. These tweaks add variety without breaking the bank.
Do I need to flush the soil after feeding with organic fertilizer?
Not after every feed, but a flush is essential whenever you spot salt buildup or leaf‑tip burn. Run cool water through the pot until it drains freely, let it sit for a minute, then repeat. This mimics a gentle rain shower, clearing excess nutrients and giving the microbial community room to breathe. After flushing, wait a day before the next feed to let the roots recover.